
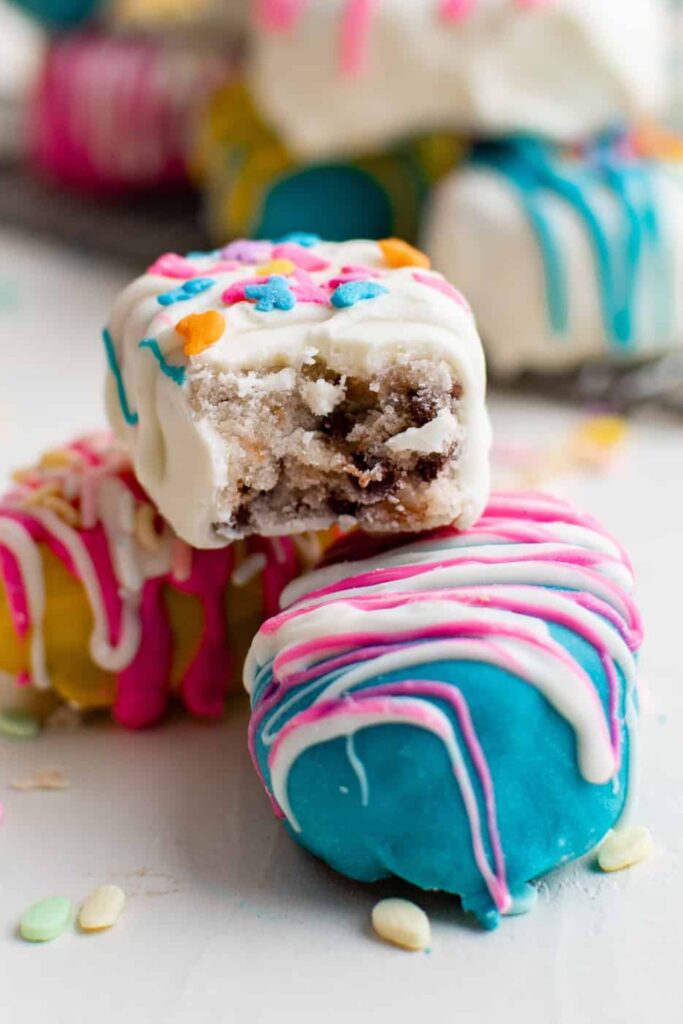

I don’t know what it is about Easter, but every year I get this urge to make something colorful and just a little extra cute. Not complicated, not bakery-level perfect, just fun food that feels like spring showed up in my kitchen. That’s how these cookie dough truffles became a thing for me.
The first time I made them, I was honestly just trying to avoid turning on the oven. I wanted something sweet, quick, and safe enough for the kids to sneak bites along the way. These checked every box without me even realizing it at the time.
Now I make them almost every year, sometimes twice if they disappear too fast. And they always do. There’s just something about that soft cookie dough center and that chocolate shell that makes people grab one… then two… then suddenly the tray is empty.
Why I Keep Coming Back to These Every Spring
There are a lot of Easter desserts out there, but I keep coming back to this one because it doesn’t stress me out. I don’t have to measure everything perfectly or worry about baking times. It’s forgiving, which is honestly my favorite kind of recipe.
It’s also one of those things that looks way fancier than it is. Once they’re dipped in chocolate and sprinkled with pastel bits, they look like something I picked up from a bakery. I didn’t. I was standing in my kitchen in sweatpants, half paying attention.
I also like that it’s safe to eat as I go. No eggs in the dough, and I heat-treat the flour, so I don’t have that little voice in my head telling me to stop sneaking bites. Not that I would’ve listened anyway.
And if you’ve ever tried baking with kids, you already know this part matters. Rolling dough into balls, tossing in candy, dipping in chocolate, it’s messy but in a good way. Nobody needs to be precise. Everyone just jumps in.
Ingredients I Used for the Recipe
- ½ cup unsalted butter, softened – this makes the dough creamy and rich, so I always let it sit out until it’s really soft.
- ¾ cup brown sugar – gives that classic cookie dough flavor and a slight caramel sweetness.
- 2 tablespoons milk – helps loosen the dough so it’s soft enough to roll.
- 1 teaspoon vanilla extract – I never skip this, it pulls everything together.
- 1½ cups heat-treated all-purpose flour – the base of the dough, I microwave it briefly to make it safe.
- ½ teaspoon salt – just enough to balance the sweetness.
- 1 cup pastel candy pieces – this is where the Easter vibe really shows up.
- 12 ounces chocolate chips or almond bark – for coating, I usually go with almond bark because it melts smoother for me.
- Easter sprinkles (optional) – I say optional, but I almost always add them.
How to make Easter Cookie Dough Truffles Recipe?
Step 1 – Cream the butter and sugar
I start by mixing the softened butter and brown sugar together until it’s smooth. Not rushed, I let it get nice and creamy because that texture matters later.
Step 2 – Add the liquid ingredients
Then I mix in the milk and vanilla. This is where it starts smelling like actual cookie dough and I usually pause for a second just to appreciate that.
Step 3 – Mix in the dry ingredients
I stir in the heat-treated flour and salt slowly. If it looks a little crumbly at first, I don’t panic, it always comes together.
Step 4 – Fold in the candy
This is the fun part. I toss in the pastel candy pieces and mix just enough so they’re spread out. Sometimes I sneak a few extra in. No regrets.
Step 5 – Shape the dough
I scoop out small portions and roll them into balls. If I’m feeling festive, I shape them into little egg forms. Not perfect eggs, just close enough.
Step 6 – Chill until firm
I place them on a lined tray and pop them in the freezer. Usually around 30 to 60 minutes. They need to be firm or dipping gets messy fast.
Step 7 – Melt the chocolate
I melt the chocolate in short bursts in the microwave. Stir, wait, repeat. I’ve burned chocolate before and learned my lesson the hard way.
Step 8 – Dip each truffle
Using a fork, I dip each chilled piece into the chocolate. I tap off the extra gently, though sometimes I get impatient and it shows.
Step 9 – Decorate quickly
While the coating is still wet, I add sprinkles. If I wait too long, they don’t stick, and then I have to redo it which is annoying.
Step 10 – Let them set
I leave them alone until the chocolate hardens. This is the hardest part honestly, because I always want to try one right away.
Little Things I Learned the Hard Way
The first time I made these, I didn’t chill the dough long enough. Big mistake. The balls started falling apart in the chocolate and I ended up with a weird chunky coating situation. Still tasted good, just didn’t look great.
I also tried using regular chocolate chips once without adding anything to thin them out. It turned into this thick, stubborn mess. Now I stick with almond bark or I add a bit of oil if I’m using chips.
Another thing, don’t try to dip all of them at once. Keep the rest in the fridge or freezer while you work. Warm dough gets soft fast and then everything becomes harder than it needs to be.
And if you’re shaping them into eggs, don’t overthink it. I used to try to make them all identical. Now I just go with it. A little uneven actually looks more homemade, and I kind of like that.
How I Usually Serve These
Most of the time, I just pile them onto a plate and set them out with other desserts. They disappear faster than anything else, which still surprises me every time.
I’ve also packed them into little bags as treats. They hold up really well, and they feel like something special even though they’re simple.
One year I tucked a few into Easter baskets, and that ended up being my favorite way to use them. It felt more personal than just candy from a store.
They also work great as a casual after-dinner dessert. No cutting, no serving, just grab one and that’s it. I like desserts that don’t need plates sometimes.
Tips
- Always chill the dough before dipping – it saves you from a mess later.
- Use a fork or dipping tool instead of your hands – less sticky, less frustrating.
- Work in small batches so the dough stays cold.
- Add sprinkles right after dipping or they won’t stick.
- Store leftovers in the fridge because of the butter in the dough.
- If the chocolate feels too thick, add a little oil to smooth it out.
I usually keep these in the fridge and they last a few days, though honestly they rarely make it that long. If I’m planning ahead, I’ll make them a day or two early and they still taste just as good.
There’s something really satisfying about a recipe like this. It’s easy, it’s flexible, and it doesn’t demand perfection. And somehow, it still ends up being one of the most loved things on the table.
That’s probably why I keep coming back to it every spring. Not because it’s impressive, but because it works. Every single time.
Easter Cookie Dough Truffles Recipe
Description
These Easter Cookie Dough Truffles are soft, creamy, and packed with sweet cookie dough flavor, all wrapped in a colorful chocolate shell. They are completely no-bake, super easy to make, and loaded with pastel candy pieces that make them perfect for spring celebrations, Easter baskets, or dessert tables. With simple ingredients and minimal effort, these bite-sized treats come together quickly and always disappear fast.
ingredients
Cookie Dough Filling
Coating
Instructions
Prepare Dough
-
Place the flour in a microwave-safe bowl and heat in 30-second intervals for about 2 minutes, stirring between each interval to heat-treat it. Let cool.
-
In a large mixing bowl, beat the softened butter and brown sugar together until smooth and creamy.
-
Mix in the vanilla extract until fully combined.
-
Add half of the flour and half of the sweetened condensed milk, mixing until combined.
-
Add the remaining flour and condensed milk and mix until a soft dough forms.
-
Stir in the mini chocolate chips.
Shape and Chill
-
Scoop about 1½ to 2 tablespoons of dough and shape into egg-like forms.
-
Place on a parchment-lined baking sheet and chill in the refrigerator for 2 hours or freeze for 1 hour until firm.
Coat and Decorate
-
Place each color of candy melts in separate bowls and melt in 30-second intervals, stirring until smooth.
-
Dip each chilled dough piece into melted candy coating using forks, letting excess drip off.
-
Return to parchment paper and repeat with remaining truffles.
-
Drizzle with melted white candy coating and immediately add sprinkles if using.
-
Allow coating to fully set before serving.
Nutrition Facts
Servings 18
Serving Size 1 truffle
- Amount Per Serving
- Calories 180kcal
- % Daily Value *
- Total Fat 10gg16%
- Saturated Fat 6gg30%
- Trans Fat 0gg
- Cholesterol 20mgmg7%
- Sodium 70mgmg3%
- Potassium 60mgmg2%
- Total Carbohydrate 22gg8%
- Dietary Fiber 1gg4%
- Sugars 16gg
- Protein 2gg4%
- Calcium 4% mg
- Iron 6% mg
* Percent Daily Values are based on a 2,000 calorie diet. Your daily value may be higher or lower depending on your calorie needs.
Note
- Heat-treat flour: This step makes the dough safe to eat without baking.
- Keep dough cold: Chilled dough is much easier to dip in melted chocolate.
- Use candy melts: They melt smoother than chocolate chips and are easier for coating.
- Customize colors: Use any pastel or seasonal colors you like.
- Storage: Keep leftovers refrigerated for best texture.

Frequently Asked Questions
Are these safe to eat without baking?
Yes, the dough contains no eggs and the flour is heat-treated, making it safe to eat.
Can I freeze these truffles?
Yes, store them in an airtight container and freeze for up to 2 months.
Do they need to be refrigerated?
Yes, since they contain butter and condensed milk, refrigeration helps maintain texture and freshness.
Can I make them ahead of time?
Absolutely, they can be made up to 3 days in advance and stored in the fridge.