

There’s something wonderfully spooky about a treat that makes you do a double-take. You know, the kind that has guests leaning in for a closer look before they dare to take a bite.
That’s the magic of Witches Fingers Cookies. They’re a playful, slightly macabre delight that turns a classic sugar cookie into a Halloween masterpiece.
Imagine a platter of these gnarled, knuckled fingers reaching out from a bed of crushed Oreo “dirt.” The gasps quickly turn into laughter, and then into eager hands reaching for more.
They have this fantastic ability to be both a centerpiece and a conversation starter. And the best part? They’re secretly just a simple, buttery cookie in a brilliantly creepy disguise.
Even if you’re not a seasoned baker, you can pull these off. It’s more about the artistry of the shaping than any complex culinary technique.
So, roll up your sleeves and get ready to create a batch of cookies that are as fun to make as they are to eat. Let’s bring a little bit of harmless, delicious fright to your kitchen.
The Spooky Story Behind the Recipe
This particular recipe has a bit of a celebrity pedigree. It’s inspired by the myself, and I love a good, spooky-themed treat.
She understood that the best Halloween recipes aren’t just about taste, but about theater. They create a moment, a memory.
I recall seeing her version years ago, and what stuck with me was the clever simplicity. A basic sugar cookie dough, transformed.
It’s a testament to how a few small details—a knuckle indent here, a well-placed almond there—can create something truly spectacular.
This is my take on that classic concept, honed through many a Halloween trial run. It’s a recipe that feels timeless, like a ghost story told year after year.
Ingredients Needed for the Recipe
Gathering your ingredients is the first step in the spell. Here’s what you’ll need to conjure up about five dozen ghoulish digits.
- 1 cup butter, at room temperature: This is the base of our cookie, providing that rich, melt-in-your-mouth texture. Softened butter creams beautifully with the sugar.
- 1 cup powdered sugar: It gives the cookies a delicate sweetness and a tender crumb that’s just perfect. Granulated sugar can make them spread too much.
- 1 egg: Our binding agent. It brings the dough together and adds structure so your fingers don’t fall apart.
- 1 teaspoon vanilla: The warm, familiar flavor that makes every sugar cookie taste like home.
- 1 teaspoon almond extract: This is the secret weapon. It adds a subtle, nutty depth that wonderfully complements the almond “nail.”
- 2 ¾ cups flour: The foundation. It gives the dough body and allows you to shape it without it becoming sticky or tough.
- 1 teaspoon baking powder: A little leavening agent gives the cookies a slight lift, making them tender rather than rock-hard.
- ½ teaspoon salt: Never skip this! It balances the sweetness and makes all the other flavors pop.
- Red gel frosting or red jam/jelly: This is for the gruesome, bloody nail bed. Gel frosting holds its color well, but jam offers a natural alternative.
- 60 whole blanched almonds or sliced almonds: The all-important fingernails. Blanched almonds have that pale, ghostly look that’s just right for a witch.
How to make Witches Fingers Cookies?

The transformation from simple dough to creepy digits is where the real fun begins. Follow these steps, and you’ll have a coven’s worth of cookies in no time.
Step 1: Creaming the Base
Grab a large bowl and your handheld mixer. Cream together the softened butter and powdered sugar until the mixture is light, pale, and fluffy.
This isn’t a step to rush. Creaming incorporates air, which helps give our cookies a lovely texture.
Step 2: Adding the Wet Ingredients
Beat in the egg, vanilla, and almond extract. Make sure everything is fully combined before moving on.
You should have a smooth, cohesive mixture that smells absolutely amazing from the extracts.
Step 3: Whisking the Dry Ingredients
In a separate bowl, whisk together the flour, baking powder, and salt. This ensures the leavening and salt are evenly distributed throughout the flour.
No one wants a pocket of baking powder in their cookie!
Step 4: Combining the Dough
Slowly add the dry ingredients to the butter mixture, mixing on a low speed until the dough just comes together.
It might seem a bit crumbly at first, but it should hold together when you press it with your fingers.
Step 5: The Essential Chill
Wrap the dough in plastic wrap and pat it into a disk. Please, please refrigerate it for at least 30 minutes.
This chills the butter back down, which is the single biggest secret to preventing cookie-spreading disaster.
Step 6: Shaping the Fingers
Preheat your oven to 325°F and line your baking sheets with parchment paper. Now for the sculpting.
Scoop out small amounts of dough and roll them into 1-inch balls. Then, carefully roll each ball into a log about 3 inches long.
Step 7: Creating the Details
Lay the “fingers” on your baking sheet. Use the dull side of a knife to make three shallow lines for the knuckle.
Pinch the dough above and below the knuckle to give the finger a bony, realistic shape. Press your fingertip at the top to create a nail bed.
Step 8: The Final Chill Before Baking
Once a baking sheet is full, pop it into the freezer for just a few minutes. This is our second defense against spreading.
Cold dough going into a hot oven is the key to cookies that hold their beautifully grotesque shape.
Step 9: Baking to Perfection
Bake the chilled fingers for about 15 minutes, or until the edges are just barely starting to turn a light golden brown.
You don’t want them to get too dark, or they’ll look more like burnt twigs than witch fingers!
Step 10: Adding the Ghoulish Touch
Let the cookies cool for just a minute or two. Then, dab a little red gel or jam onto the nail bed and press an almond into it.
As the cookies cool completely, the “blood” will set, gluing the nail firmly in place.
Best Time to Serve This Dish
These cookies are, without a doubt, the star of any Halloween celebration. They’re perfect for a party platter, peeking out from a bowl of Halloween candy.
But their charm isn’t limited to October 31st. Consider them for a spooky movie night, a Harry Potter marathon, or a themed birthday party.
They also make a fantastic, unexpected treat for a school bake sale. Kids absolutely adore the creepy factor, and parents appreciate that they’re homemade.
Really, any time you want to inject a little playful spookiness into your day is the right time for a Witches Finger Cookie.
Tips
A few insider secrets can make the difference between good cookies and gloriously ghoulish ones. Here’s how to ensure yours are perfect.
- If the dough becomes soft and sticky while you’re working, don’t panic. Just put the bowl or the baking sheet back in the fridge for ten minutes.
- Chilled dough is your best friend here. It’s far easier to shape and will hold its detail in the oven.
- If your dough seems too crumbly and won’t come together, add a few drops of milk. Do this one drop at a time until the texture is just right.
- For the nails, sliced almonds can work in a pinch, but whole blanched almonds have that perfect, creepy shape. They truly look like long, witchy fingernails.
- When creating the knuckles, don’t be afraid to press firmly. The indentations should be visible but not so deep that they cut through the dough.
Ingredient Substitutions
Don’t have every single item on the list? No worries. Halloween magic is all about improvisation.
If you’re out of almond extract, you can use all vanilla extract. You’ll lose a bit of that nuanced flavor, but the cookies will still be delicious.
For a nut-free version, simply skip the almond entirely. Use the red gel to create a bloody stump instead of a nail bed. It’s just as spooky!
If you can’t find blanched almonds, it’s easy to do it yourself. Boil raw almonds for one minute, rinse in cold water, and the skins will slip right off.
As for the “blood,” red jam is a fantastic natural alternative to food coloring gels. Strawberry or raspberry works beautifully and adds a little fruity flavor.
How to Store and Reheat
You’ll want these creepy creations to stay fresh and frightful. Proper storage is key.
Once the cookies are completely cool, store them in a single layer in an airtight container. They’ll keep at room temperature for up to five days.
If you stack them, place a sheet of parchment paper between layers to protect the delicate almond nails from breaking.
You can also freeze the baked cookies for up to three months. Just thaw them at room temperature when you’re ready to serve.
I don’t recommend freezing the raw dough for this recipe, as the detailed shapes can get damaged and lose their definition.
Flavor Variations
While the classic almond-vanilla combo is perfect, don’t be afraid to get creative with your coven’s cookies.
For a chocolatey twist, replace ¼ cup of the flour with unsweetened cocoa powder. You’ll get a darker, earthier finger that looks even more sinister.
A pinch of cinnamon or pumpkin pie spice added to the dry ingredients can give a warm, autumnal flavor that feels very festive.
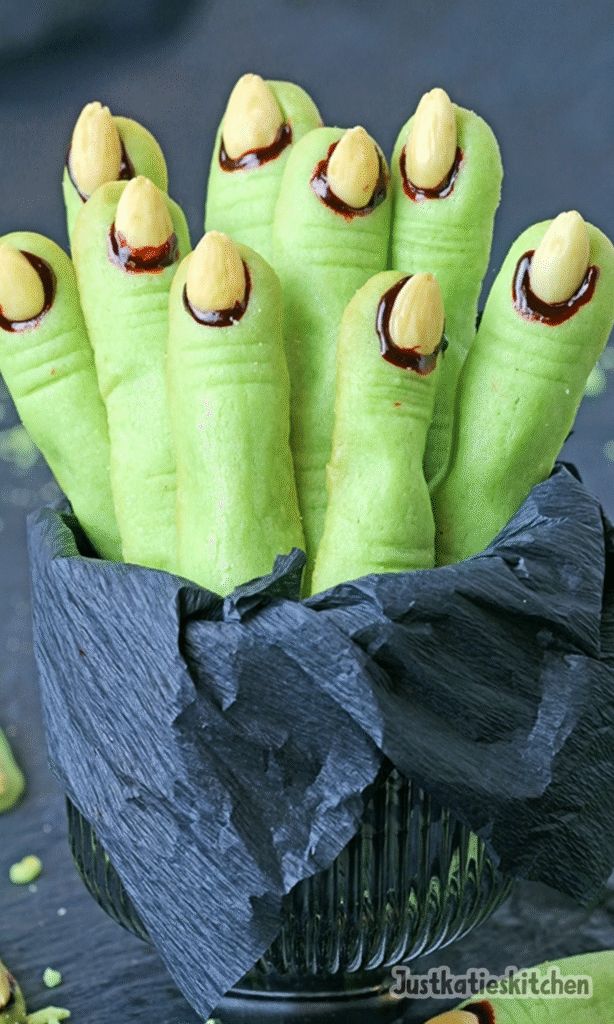
For a truly green witch’s finger, add a few drops of green food coloring to the wet ingredients. Just be careful not to over-mix once the color is in.
You could even roll the shaped dough in coarse sugar before baking for a “sparkly” or “frostbitten” effect. The possibilities are endless.
The goal is to have fun and make the recipe your own. After all, every witch has her own special recipe, right?
Witches Fingers Cookies Recipe
Description
Whip up some gnarly Witches Fingers Cookies for Halloween. They’re a fun, not super spooky Halloween treat that will attract all sorts of attention as well as loads of compliments—they’re as tasty as they are creepy! Even nut-haters will enjoy these spooked-up Halloween sugar cookies (just remove the almond “nail” and munch away!).
ingredients
Instructions
-
Using a handheld mixer, in a large bowl, cream together the butter and sugar. Beat in the egg, vanilla, and almond extract.
-
In another bowl, whisk together the flour, baking powder, and salt. Slowly add to the butter mixture.
-
Wrap the dough in plastic wrap and pat it into a disk. Chill for at least 30 minutes.Chilling prevents spreading during baking.
-
Line baking sheets with parchment paper. Preheat oven to 325°F (163°C).
-
Scoop out dough and roll into 1-inch diameter balls. Then roll them into 3-inch long 'fingers.' Place the fingers on the baking sheets about 2 inches apart.
-
Use the dull side of a knife to make 3 parallel indentations midway down each finger to represent knuckles. Pinch the dough above and below the knuckle to create finger shape. Press a small dimple at the top of each finger for the nailbed.
-
Place the baking sheet in the freezer for a few minutes while preparing the second sheet.This helps maintain shape during baking.
-
Bake chilled fingers for about 15 minutes or until golden.
-
Remove from oven and let cool for a few minutes. Squeeze a small dot of red gel frosting (or jam) onto the nailbed and press an almond on top. Let cool completely so the almond adheres.
Nutrition Facts
Servings 30
Serving Size 2 cookies
- Amount Per Serving
- Calories 156kcal
- % Daily Value *
- Total Fat 10g16%
- Saturated Fat 4g20%
- Cholesterol 22mg8%
- Sodium 119mg5%
- Potassium 45mg2%
- Total Carbohydrate 16g6%
- Dietary Fiber 1g4%
- Sugars 5g
- Protein 3g6%
- Calcium 20 mg
- Iron 0.8 mg
* Percent Daily Values are based on a 2,000 calorie diet. Your daily value may be higher or lower depending on your calorie needs.
Note
- Dough too crumbly? Add milk, 1/2 tsp at a time, until it holds together.
- No whole almonds? Use sliced almonds—they still look creepy!
- Make ahead: Shape and freeze unbaked fingers on a tray, then transfer to a freezer bag. Bake from frozen—add 2–3 extra minutes.
- Natural alternative: Swap red gel for strawberry or raspberry jam for the nail beds.
Frequently Asked Questions
What are Witches Fingers?
Witches Fingers are sugar cookies shaped like gnarly fingers, with almond 'nails' and red 'bloody' nail beds. Knuckle wrinkles are made with a knife, and the dough is pinched to mimic finger joints.
How do you blanch almonds?
Boil almonds for 1 minute, drain, rinse under cold water, then slip off the skins with your fingers. Pat dry before using.