

What I love most is how dependable it is. I can make it for a holiday dinner or a random cold evening and it always delivers. People don’t just eat it, they go back for more. That’s usually my sign that something is worth keeping around.
I think part of it is the texture. When it’s done right, the potatoes are soft but not falling apart, and the sauce wraps around everything without feeling heavy. It’s rich, yeah, but not overwhelming.
The Ingredients I Actually Use
I keep this pretty simple, and I don’t overthink it. The ingredients matter, but it’s more about how they come together.
Potatoes
I always use russet potatoes. They’re starchy, which means they soak up the sauce instead of resisting it. I’ve tried others, but russets give me that soft, almost silky texture that I’m looking for.
Butter and Garlic
This is where the flavor starts building. I melt butter and cook the garlic just until it smells good. Not browned, not crispy, just enough to wake everything up.
Flour
This helps thicken the sauce. It’s not exciting, but it’s necessary. I used to rush this step and ended up with a weird texture, so now I take my time.
Stock
I switch between chicken stock and vegetable stock depending on who I’m cooking for. Both work just fine.
Milk
Whole milk, always. I’ve tried lighter options and it just doesn’t feel the same. This dish isn’t the place to cut corners.
Cheese
Sharp cheddar is my go-to. It melts well and adds real flavor. Sometimes I mix in a little Gruyère or Parmesan, but cheddar is what I trust.
Seasonings
Salt, pepper, thyme, and just a little nutmeg. That nutmeg doesn’t stand out on its own, but if you leave it out, something feels missing.
How I Slice the Potatoes
This part matters more than people think. I slice them thin, about 1/8 inch. Not perfect, just close enough. If they’re too thick, they won’t cook evenly. Too thin and they can turn mushy.
I usually use a mandoline when I’m feeling patient enough to do it safely. Otherwise, I grab a sharp knife and take my time. It’s slower, but it works.
After slicing, I rinse them in cold water. It helps remove extra starch. I didn’t always do this, and I could tell the difference later. The sauce gets weirdly gluey if you skip it.
Then I dry them really well. That part is just as important.
Making the Cream Sauce
This is the heart of the whole dish. If the sauce is off, everything is off.
I start by melting butter in a pan and adding garlic. Then I sprinkle in the flour and stir it around until it looks smooth. It doesn’t take long, maybe a minute or two.
Then I slowly pour in the stock while stirring. Slowly matters here. If I rush it, I get lumps, and no one wants that.
After that, I add the thyme, salt, pepper, and nutmeg. The smell at this point is already pretty great.
Next comes the milk. I add it gradually and keep stirring until the sauce thickens. It should feel creamy but still pourable. Not too thick, not too thin.
Then I stir in some of the cheese until it melts into the sauce. At this point, it’s hard not to taste it straight from the pan.
Layering Everything Together
I don’t overcomplicate this part. I just build layers.
- A layer of potatoes
- A bit of salt
- A layer of sauce
I repeat that three times. It doesn’t have to be perfect. I just try to spread everything out evenly.
The top layer gets extra cheese. That’s what gives you that golden, bubbly finish.
Baking Until It Feels Right
I cover the dish first and bake it so the potatoes soften without drying out. After a while, I uncover it and let the top turn golden and slightly crispy.
The total time is a little over an hour, but I don’t watch the clock too closely. I check with a knife to see if the potatoes are tender. That’s what matters.
When it comes out of the oven, it smells like something you want to eat immediately. But I’ve learned to wait.
Letting It Rest (Even Though I Don’t Want To)
This part is annoying, but necessary. I let it sit for about 15 minutes before serving.
If I cut into it too soon, the sauce runs everywhere. When I wait, everything settles and the layers hold together better.
It’s a small step, but it makes a big difference.
Making It Ahead Without Stress
This is one of the biggest reasons I rely on this recipe for holidays. I can make it ahead of time.
I bake it covered for about an hour, let it cool, then refrigerate it. It holds up really well for a couple of days.
When I’m ready to serve, I take it out, let it sit on the counter for a bit, then reheat it in the oven until it’s warmed through.
It still tastes just as good, maybe even better.
Scalloped vs Au Gratin
I’ve heard all the technical explanations, but honestly, I don’t stress about it. Traditionally, scalloped potatoes don’t always include cheese, and au gratin does.
But I use cheese. A lot of it. So call it whatever you want, I’m still making it the same way.
Small Mistakes I’ve Learned to Avoid
- Not drying the potatoes properly after rinsing
- Rushing the sauce and ending up with lumps
- Cutting uneven slices that cook differently
- Skipping seasoning between layers
I’ve done all of these at least once. Fixing them is what made the biggest difference.
Ways I Sometimes Change It Up
Most of the time I stick to the classic version, but every now and then I switch things up a little.
- Mixing in Gruyère for a deeper flavor
- Adding extra garlic when I’m in the mood
- Using vegetable stock to keep it vegetarian
Nothing too wild. Just small changes depending on what I feel like.
How I Usually Serve It
I serve this with just about everything. It works with big holiday meals, but also with simple dinners.
Sometimes I pair it with roasted meat, sometimes just a salad on the side. And sometimes, I just eat it straight from the dish. No judgment.
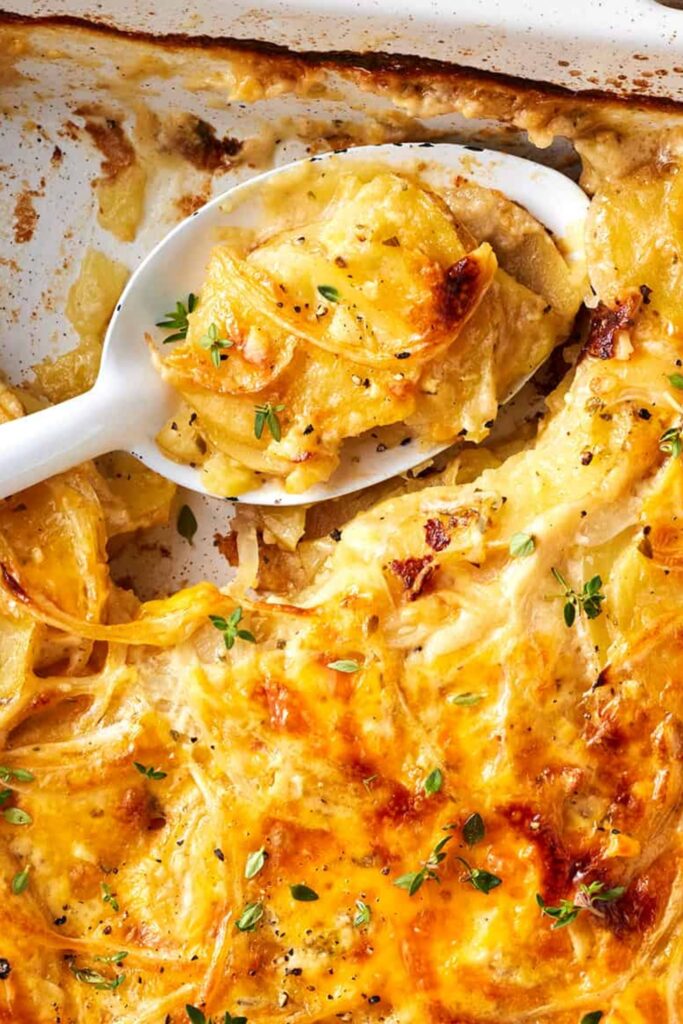
Scalloped Potatoes Recipe
Description
These Scalloped Potatoes are the ultimate comfort side! Thinly sliced russet potatoes layered with creamy garlic-thyme sauce and sharp cheddar cheese. Perfect for Thanksgiving, Easter, or any holiday gathering. Make-ahead friendly and ready in about 2 hours—elegant, comforting, and guaranteed to be a crowd-pleaser.
ingredients
Instructions
-
Preheat & Prep
Preheat the oven to 400°F (200°C) with a rack in the center position. Fill a large bowl with cold water. Grease a 9x13-inch casserole dish with butter or cooking spray. -
Slice Potatoes
Using a mandoline, slice the potatoes ⅛-inch thick and transfer them directly into the bowl of cold water. Rinse well, then place on a dry dish towel and pat until very dry.Soaking removes excess starch to prevent gluey texture. Drying thoroughly ensures the sauce adheres properly. -
Make the Roux
In a large skillet over medium heat, melt the butter. Add the garlic and cook until fragrant, about 1 minute. Sprinkle the flour over the butter, stir to combine, and cook for 1 to 2 minutes.Cooking the flour removes the raw taste and helps thicken the sauce. -
Build the Cream Sauce
Very slowly pour in the chicken stock, stirring to combine. Add the thyme, 1 teaspoon of salt, pepper, and nutmeg. Whisk until the mixture becomes very thick, about 3 minutes.Add stock slowly to prevent lumps. The sauce should coat the back of a spoon. -
Incorporate Milk & Cheese
Increase heat to medium-high. Working in small batches, slowly add the milk, whisking continuously, until the sauce has thickened and milk is fully incorporated, about 5 minutes. Reduce heat to low and stir in 1 cup of the cheese until fully combined. Remove from heat.Adding milk gradually prevents curdling. Reserve 1 cup cheese for the final topping. -
Layer the Casserole
In the baking dish, arrange ⅓ of the potatoes in an even layer. Sprinkle with ½ teaspoon of salt. Pour ⅓ of the cream sauce over the top. Repeat with half the remaining potatoes, ½ teaspoon salt, and half the remaining sauce. Add the final layer of potatoes, remaining salt, and remaining sauce. Top with the remaining 1 cup of cheese.Create 3 even layers for consistent cooking and flavor distribution. -
Bake Covered
Cover the dish tightly with aluminum foil and bake on the center rack for 35 minutes.Covering traps steam to cook the potatoes through without drying out. -
Bake Uncovered
Remove the foil and continue baking until the potatoes are tender when pierced with a fork and the cheese is bubbling and golden, about 40 more minutes.Uncovering allows the top to brown beautifully. If needed, broil for 2-3 minutes at the end for extra crispiness. -
Rest & Serve
Remove from the oven, cover loosely, and allow to rest for 15 minutes. Top with fresh thyme leaves and freshly cracked pepper before serving.Resting allows the sauce to set slightly for cleaner slices.
Nutrition Facts
Servings 8
Serving Size 1 serving (approx. 1/8 of casserole)
- Amount Per Serving
- Calories 314kcal
- % Daily Value *
- Total Fat 15gg24%
- Saturated Fat 9gg45%
- Trans Fat 0gg
- Cholesterol 44mgmg15%
- Sodium 932mgmg39%
- Potassium 685mgmg20%
- Total Carbohydrate 37gg13%
- Dietary Fiber 2gg8%
- Sugars 5gg
- Protein 11gg22%
- Calcium 245mg mg
- Iron 1.2mg mg
* Percent Daily Values are based on a 2,000 calorie diet. Your daily value may be higher or lower depending on your calorie needs.
Note
- Make-Ahead Magic: Cook covered for 60 minutes, cool completely with foil on, refrigerate up to 3 days. Reheat covered at 400°F for 45 minutes, then uncover and broil 2-3 minutes for a golden top.
- Cheese Swaps: Try Gruyère, Swiss, smoked Gouda, or Parmesan (use half the amount for Parm). Mix cheeses for extra depth!
- Mandoline Safety: Always use the guard when slicing potatoes. If using a knife, take your time for even ⅛-inch slices.
- Dish Size Matters: A 9x13-inch dish works best. Deeper dishes may need longer baking; shallower ones cook faster.
- Vegetarian Option: Use vegetable stock instead of chicken stock to keep this side dish fully vegetarian-friendly.
- Don't Skip the Rest: Letting the casserole rest 15 minutes before serving helps the sauce set for cleaner, prettier portions.
Frequently Asked Questions
Can I make scalloped potatoes ahead of time?
Absolutely! Bake covered for 60 minutes, cool completely without removing the foil, and refrigerate for up to 3 days. When ready to serve, remove from fridge 30-45 minutes before reheating, then bake covered at 400°F until warmed through (about 45 minutes). Uncover and broil 2-3 minutes for a golden, bubbly top.
What's the difference between scalloped potatoes and potatoes au gratin?
Traditionally, scalloped potatoes are baked in a creamy milk or cream sauce, while au gratin always includes cheese. Today, the terms are often used interchangeably. This recipe includes sharp cheddar for that irresistible cheesy, golden crust—so you get the best of both worlds!
Can I freeze scalloped potatoes?
Yes! Freeze individual portions or the entire unbaked or partially baked casserole in a freezer-safe dish. Thaw overnight in the fridge, then bake covered at 400°F until heated through (about 45-60 minutes), uncover, and finish baking until golden.
Can I use heavy cream instead of milk?
You can substitute half the milk with heavy cream for an extra-rich sauce (1½ cups cream + ½ cup milk). Using all heavy cream may prevent the sauce from thickening properly, so we recommend keeping some milk in the mix.
How do I prevent my scalloped potatoes from being gluey?
The key is rinsing the sliced potatoes in cold water to remove excess starch, then patting them very dry before layering. Also, make sure your cream sauce is properly thickened before assembling—this ensures a silky, not gummy, final texture.