Let’s be honest. Some desserts are polite, and some are deliciously mischievous. These cupcakes fall squarely into the latter category.
They’re a playful, slightly spooky treat that’s perfect for when you want to bake something that’s both beautiful and a little bit thrilling. The reaction you get when people see them is half the fun.
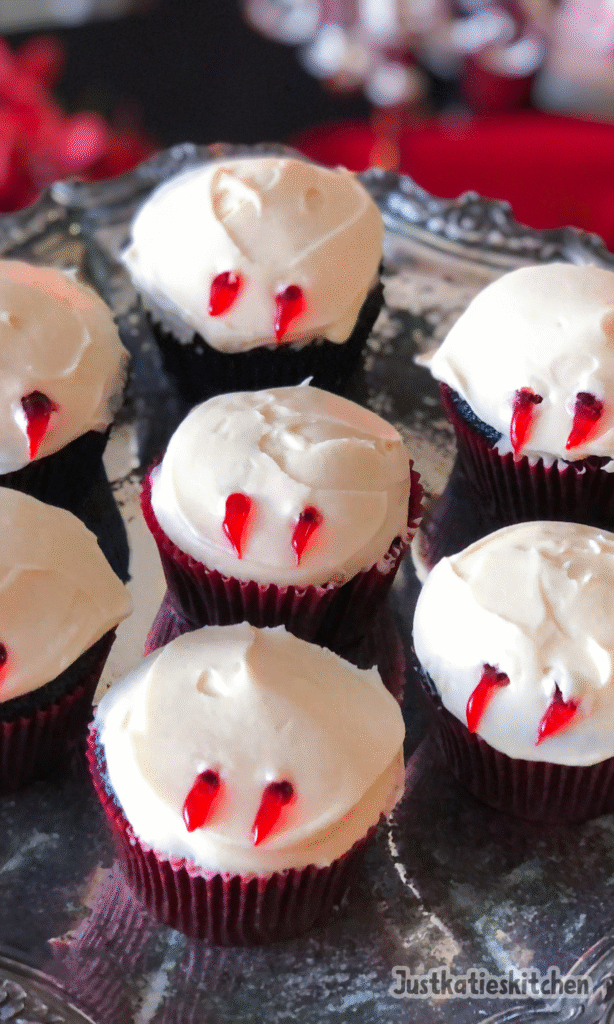
Imagine a deep red velvet cupcake, so moist and tender it practically melts. It’s filled with a secret pocket of dark chocolate and bright raspberry jam, then topped with a cloud of the creamiest frosting. And then, the final touch: two little “bite marks” that ooze with a crimson “blood.” It’s a story in every bite.
Ingredients Needed for the Recipe
Gathering your ingredients is the first step on this fun baking adventure. Having everything at room temperature, especially the dairy items, is the secret handshake to a perfectly smooth batter and frosting.
It makes all the difference, I promise. Let's break down what you'll need and why each component matters.
Cake Flour: This gives the cupcakes their signature delicate, soft crumb. It’s lighter than all-purpose flour, so your vampires won’t have to chew through a tough cupcake.
Granulated Sugar: For sweetness, of course, but it also helps create that lovely, tender texture we’re after.
Dutch Process Cocoa Powder: This cocoa is less acidic and has a deeper, darker chocolate flavor. It’s what gives red velvet its distinct taste and that rich color base.
Baking Soda: Our leavening agent. It reacts with the acidic ingredients to make the cupcakes rise beautifully.
Fine Salt: A must-have to balance all the sweetness and make the chocolate flavor pop. Don’t skip it.
Buttermilk: The tangy superstar. Buttermilk adds incredible moisture and a subtle tang that defines the red velvet experience.
Vegetable Oil: This keeps the cupcakes wonderfully moist for days, much more so than butter would. It’s the key to that melt-in-your-mouth feel.
Sour Cream: Another secret weapon for richness and moisture. It makes the crumb incredibly tender.
Red Food Coloring: For that dramatic, vampiric red hue. You’ll use a full tablespoon for the batter and just a drop for the “blood.”
Cider Vinegar: It reacts with the baking soda to give the cupcakes a good lift, and it enhances the tangy flavor profile.
Pure Vanilla Extract: For that warm, comforting aroma and flavor that complements the chocolate so well.
1 Large Egg: The binder that holds our batter together. Room temperature is best for even mixing.
Semisweet Chocolate Bar & Coconut Oil: This dynamic duo creates a magic shell inside the cupcake. It hardens to seal in the jam filling, creating a delicious surprise.
Raspberry Jam: Our “blood”! Its sweet-tart flavor is a perfect match for the chocolate and cream cheese frosting.
Cream Cheese, Unsalted Butter, Confectioners' Sugar, & Vanilla: The holy quartet for the world’s best frosting. It’s tangy, sweet, creamy, and utterly irresistible.
How to make Red Velvet Vampire Cupcakes?
This process is a joy. It’s like building a little edible surprise package. Don’t rush it; enjoy each step, from mixing the batter to creating the final gory effect.
Step 1: Prepping Your Stage
Start by preheating your oven to 350°F. This is non-negotiable for a good rise. Line a 12-cup muffin tin with those cute paper liners.
Now, grab two large bowls. In the first, we’ll sift the dry team: the cake flour, granulated sugar, Dutch process cocoa, baking soda, and salt. Sifting is your friend here—it prevents lumps and ensures everything is light and airy.
Step 2: Creating the Crimson Batter
In the second bowl, it’s time for the wet ingredients. Whisk together the buttermilk, vegetable oil, sour cream, that bold tablespoon of red food coloring, cider vinegar, vanilla, and the room temperature egg.
Whisk it until it’s a smooth, shockingly red liquid. Now, pour this red mixture into the dry ingredients. Gently stir them together until they are just combined. A few streaks are okay; overmixing is the enemy of tender cupcakes.
Step 3: Baking to Perfection
Divide this gorgeous red batter evenly among your twelve waiting liners. Pop them into the preheated oven and bake for 16 to 18 minutes.
You’ll know they’re done when a toothpick poked into the center comes out with a few moist crumbs clinging to it. Let them cool in the tin for a bit before moving them to a wire rack to cool completely. Patience is key here—warm cupcakes are fragile.
Step 4: The Secret Chocolate Seal
While the cupcakes cool, let’s make the chocolate barrier. Combine the semisweet chocolate and coconut oil in a small microwave-safe bowl. Microwave it in short bursts, stirring after each, until it’s smooth and glossy.
Now for the fun surgery. Use a small, sharp knife to cut a small plug out of the top-center of each cooled cupcake. Don’t go all the way to the bottom! You’re creating a little well. (You get to eat the plugs. Cook’s treat!)
Step 5: Filling the Core
Use a pastry brush or a small spoon to paint the inside of each hole with the melted chocolate. This is the clever part—this chocolate layer will harden and create a waterproof seal so the jam doesn’t make the cupcake soggy.
Place the cupcakes in the freezer for about 15 minutes to let the chocolate set completely. It happens surprisingly fast.
Step 6: Whipping Up the Frosting
While the chocolate hardens, make the dreamy frosting. In a large bowl, beat the room-temperature cream cheese with an electric mixer until it’s smooth and fluffy. Gradually beat in the cubes of soft butter until the mixture is perfectly smooth.
Now, add the confectioners' sugar and vanilla. Beat it all together for about a minute until it’s light, fluffy, and begging to be eaten with a spoon. Scrape this heaven into a pastry bag fitted with a large round tip.
Step 7: The Grand Finale: Bites and Blood
Take your cupcakes out of the freezer. Whisk the raspberry jam with a single drop of red food coloring and a tablespoon of water until it’s smooth and pourable. Spoon about a tablespoon of this jam into each chocolate-lined hole.
Now, pipe a generous swirl of cream cheese frosting on top of each cupcake, completely covering the jam-filled well. For the final act, take a plastic straw and poke two holes straight down through the frosting and into the cupcake cake itself. Drizzle the remaining red jam into these holes, letting it pool and drip just a little. Behold! Vampire bites.
Why This Recipe Works So Well
This isn't just a random collection of steps; it's a carefully crafted experience. The chocolate seal is the unsung hero, a brilliant trick that keeps the structural integrity of the cupcake intact.
Without it, the jam would seep into the crumb, making it mushy. With it, you get a perfect pocket of fruity flavor that bursts in your mouth alongside the cake and frosting.
The combination of oil, buttermilk, and sour cream is a triple threat against dry baked goods. It guarantees a cupcake that stays supremely moist for days, which is almost a miracle in the baking world.
Tips
For the most dramatic red color, don’t be shy with the food coloring. A full tablespoon is what it takes to get that deep, vampiric shade against the dark cocoa.
When coring the cupcakes, a small, sharp paring knife or even an apple corer works beautifully. Just twist gently and lift. The goal is a neat well, not a crater.
If your jam is particularly seedy or chunky, you can warm it slightly and then press it through a fine-mesh sieve to get a perfectly smooth “blood” for drizzling. It makes for a much more realistic effect.
Best Time to Serve This Dish
Obviously, these are the star of any Halloween party. They set the perfect mood. But don't limit them to just one holiday.
They are a fantastic, conversation-starting dessert for a Gothic-themed movie night, a birthday party for someone with a great sense of humor, or even a fun addition to a spooky book club gathering.
They turn an ordinary get-together into a memorable event. Kids absolutely adore them, and adults get a kick out of the clever presentation.
Ingredient Substitutions
No buttermilk? No problem. Make a quick substitute by adding 1 ½ teaspoons of white vinegar or lemon juice to a half-cup of regular milk. Let it sit for 5 minutes until it curdles slightly.
If you can't find Dutch process cocoa, you can use natural cocoa powder, but the color and flavor will be slightly different. For a gel-free option, you can use natural food colorings from beets, though the red will be more muted.
Any seedless red jam, like strawberry or cherry, can stand in for the raspberry. The flavor will change, but the gory effect will be just as fantastic.
How to Store and Reheat
Because of the cream cheese frosting, these cupcakes must be stored in the refrigerator. Place them in a single layer in an airtight container.
They will keep beautifully for up to 3-4 days. The cold will firm up the frosting and the cupcake, but the interior will remain wonderfully moist.
For the best eating experience, let them sit at room temperature for about 20-30 minutes before serving. This takes the chill off and allows the frosting to become creamy and soft again. I do not recommend freezing them after they are assembled, as the jam filling can cause issues.
Flavor Variations
Feel like playing mad scientist? You can easily twist the flavors. For a Black Forest vibe, use cherry jam instead of raspberry and add a little cherry liqueur to the frosting.
For a more orange-and-black theme, use blood orange jam or even a dark blackberry jam for a deeper, darker “blood.” You could even add a teaspoon of espresso powder to the dry ingredients to intensify the chocolate flavor.
The basic red velvet cupcake is a wonderful canvas. Don't be afraid to make it your own. The goal is to have fun and create something that makes you and your guests smile.
A Final Word
The brilliant mind who first dreamed up this concept, always says that baking should be an experience. It’s not just about the final product, but the joy you feel while creating it.
These Red Velvet Vampire Cupcakes embody that spirit perfectly. They are a project, a story, and a delicious treat all rolled into one. So put on some fun music, embrace the mess, and create something wonderfully spooky.
Seeing the look on someone’s face when they discover the “bite marks” is worth every single minute of effort. Happy baking!
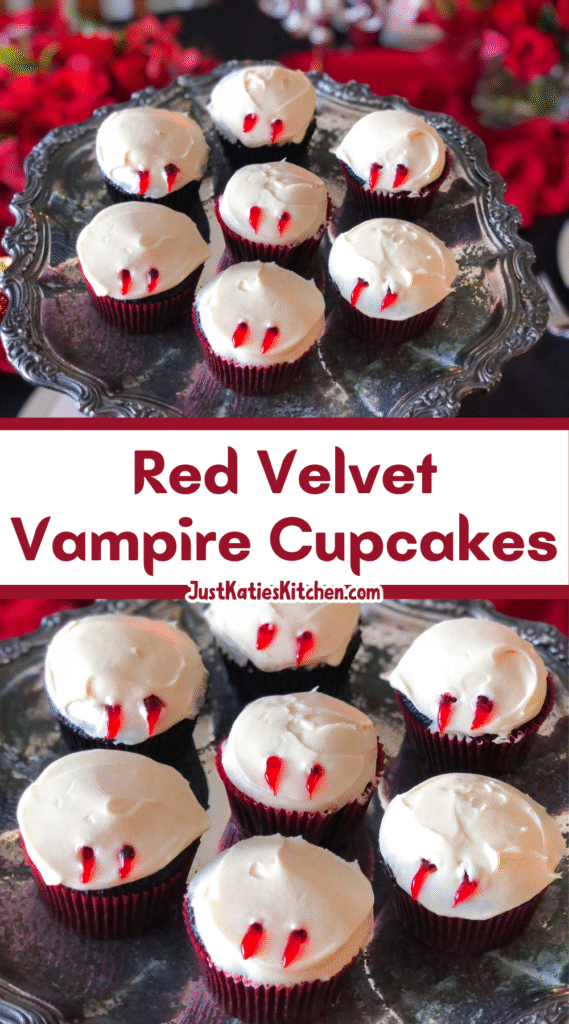
These Red Velvet Vampire Cupcakes are a delightfully spooky Halloween treat! Moist red velvet cupcakes hide a secret center of melted chocolate and raspberry “blood” jam, topped with creamy swirls of cream cheese frosting. Two vampire bite holes—drizzled with jam—complete the gory (but totally delicious) illusion. Easy to make and guaranteed to impress at any Halloween party!
ingredients
Cupcakes
1.75cups cake flour (spooned and leveled)
1cup granulated sugar
0.25cup Dutch process cocoa powder
0.75tsp baking soda
0.5tsp fine salt
0.5cup buttermilk
0.5cup vegetable oil
0.5cup sour cream
1tbsp red food coloring (plus 1 drop for filling)
2tsp cider vinegar
1tsp pure vanilla extract
1large egg (at room temperature)
13-oz semisweet chocolate bar
1tsp coconut oil
1cup raspberry jam
Cream Cheese Frosting
18-oz package cream cheese (at room temperature)
6tbsp unsalted butter (cubed, at room temperature)
1cup confectioners' sugar
0.5tsp pure vanilla extract
Instructions
1
Preheat oven to 350°F (175°C). Line a 12-cup muffin tin with paper liners.
2
Sift cake flour, sugar, cocoa powder, baking soda, and salt into a large bowl.
3
In another bowl, whisk together buttermilk, oil, sour cream, 1 tbsp red food coloring, vinegar, vanilla, and egg.
4
Pour wet ingredients into dry ingredients and stir until just combined. Divide evenly among liners.
5
Bake 16–18 minutes, or until a toothpick comes out with a few moist crumbs. Cool completely on a wire rack.
6
Microwave chocolate and coconut oil in 30-second bursts until smooth. Stir until fully melted.
7
Use a small knife to cut a plug from the center of each cupcake (leave ¼-inch base and sides). Brush insides with melted chocolate.
8
Freeze cupcakes for 15 minutes to set the chocolate lining.
9
Mix raspberry jam with 1 drop red food coloring and 1 tbsp water until smooth. Spoon 1 tbsp into each chocolate-lined hole.
10
For frosting: Beat cream cheese until smooth. Add butter and beat until combined. Mix in confectioners’ sugar and vanilla until fluffy.
11
Pipe frosting over each cupcake to fully cover the jam center.
12
Use the end of a plastic straw to poke two small holes through the frosting into the cupcake (not into the jam cavity).
13
Drizzle remaining jam into the holes to mimic 'blood.' Serve immediately or refrigerate.
Nutrition Facts
Servings 12
Serving Size 1 cupcake
Amount Per Serving
Calories390kcal
% Daily Value *
Total Fat20g31%
Saturated Fat10g50%
Trans Fat0.5g
Cholesterol60mg20%
Sodium320mg14%
Potassium180mg6%
Total Carbohydrate52g18%
Dietary Fiber1g4%
Sugars36g
Protein4g8%
Calcium 6 mg
Iron 8 mg
* Percent Daily Values are based on a 2,000 calorie diet. Your daily value may be higher or lower depending on your calorie needs.
Note
Flour tip: Always spoon flour into the measuring cup and level off—don’t scoop! This prevents dense cupcakes.
Make ahead: Bake and fill cupcakes 1 day ahead; frost and decorate just before serving for best texture.
Storage: Keep refrigerated in an airtight container for up to 2 days. Bring to room temp 30 minutes before serving.
Keywords:
red velvet vampire cupcakes, Halloween cupcakes, vampire bite cupcakes, spooky dessert, raspberry jam cupcakes, cream cheese frosting cupcakes