Let's be honest with each other for a second. A grilled cheese sandwich is not something you eat for its health benefits. It's a treat, a comfort, a glorious indulgence.
And because it’s an indulgence, it absolutely has to be worth it. No sad, pale bread with a single, lukewarm slice of cheese. We’re talking about a masterpiece here.
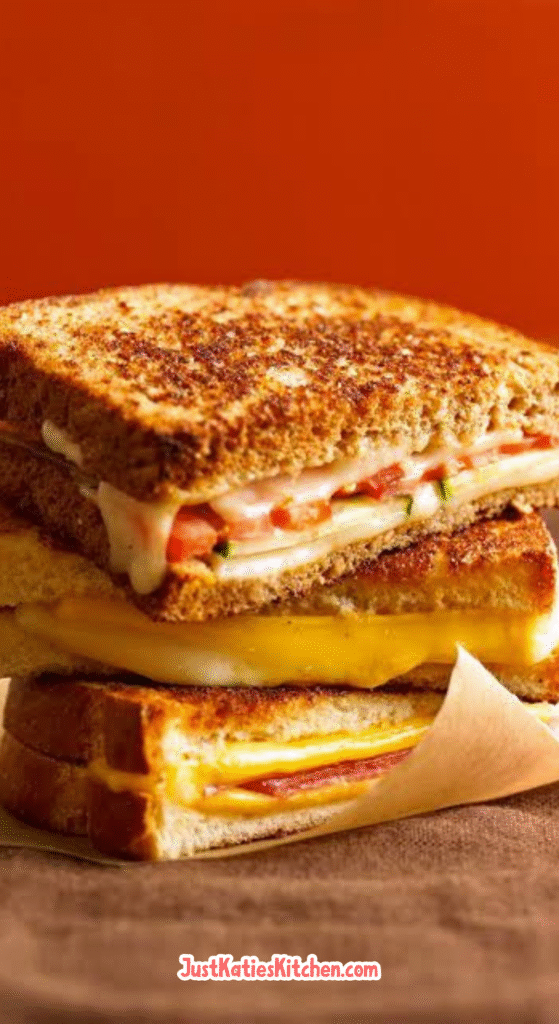
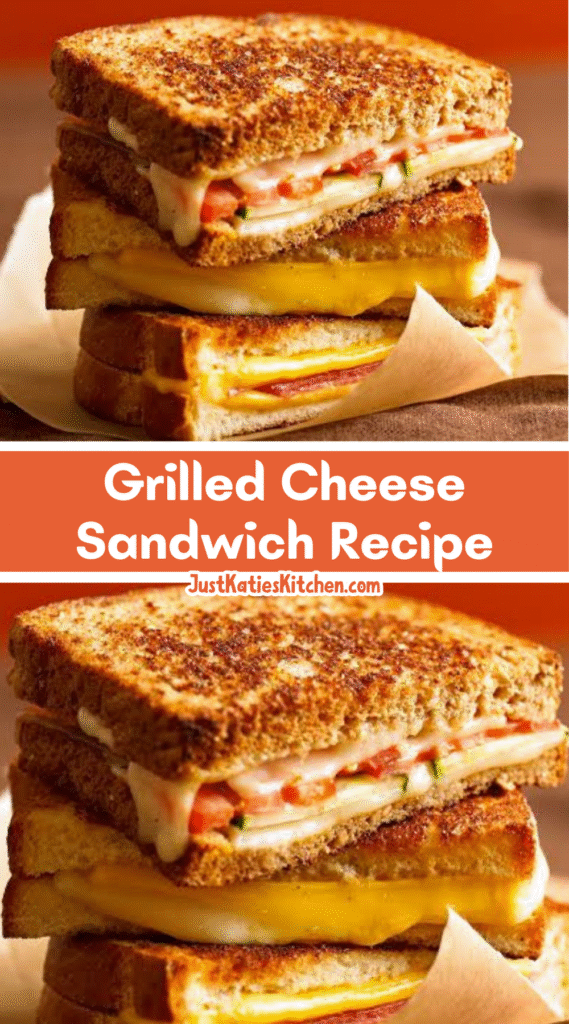
Imagine this: a shatteringly crisp, perfectly salty, golden-brown exterior that gives way to a river of molten, stretchy, gloriously cheesy goodness inside. That’s the goal. That’s the dream. And I’m here to show you how to make it a reality.
Ingredients Needed for the Recipe
This isn't a long list. But every single item plays a starring role. Choose them wisely.
• Sourdough Bread (2 slices): This is our foundation. A good, sturdy sourdough has the structure to hold all that cheese without getting soggy or collapsing. It also toasts up with an incredible texture and slight tang that cuts through the richness.
• Salted Butter (about 2 tbsp): This is non-negotiable. The salt in the butter is what makes the crust sing. It creates that addictive, savory crunch. Unsalted butter just won’t give you the same flavor punch.
• Vintage Cheddar or Gruyère (a heaped 1/3 cup, grated): This is our flavor champion. Aged cheddar brings a sharp, tangy punch, while Gruyère offers a wonderfully nutty, complex taste. They’re the soul of the sandwich.
• Mozzarella (1/3 cup, grated): This is our texture hero. Mozzarella is all about the epic, Instagram-worthy cheese pull. It melts into a soft, elastic, gooey wonder that binds everything together beautifully.
The Great Grilled Cheese Debate
Now, you might be reaching for your sandwich press right now. Stop. Put it down. Let's talk about method for a second.
There's a big difference between a pressed toastie and a true grilled cheese. A press smashes your bread, limits your cheese capacity, and often creates a tough, over-compacted crust.
Cooking in a pan, however, gives you total control. You get an even, all-over golden crust that’s simultaneously crisp and buttery. The bread retains its airy structure, and you can pack in as much cheese as your heart desires. It’s the superior method, and I’ll stand by that.
How to make My Best Grilled Cheese Sandwich?
This is where the magic happens. It’s less of a recipe and more of a sacred ritual. Follow these steps with care.
Step 1: Prepare Your Cheese and Butter
First, grate your cheeses. Do not, I repeat, do not use pre-shredded bagged cheese. It’s coated in anti-caking agents that prevent it from melting into that smooth, luxurious pool we crave.
Take your butter out of the fridge for a few minutes beforehand. You want it soft enough to spread easily without tearing your bread. Slather it on. Generously.
Step 2: Butter Every Single Surface
Here’s the first secret: butter both sides of each slice of bread. Yes, all four sides. This ensures every single bite is enveloped in that salty, crispy, golden goodness. No dry, unbuttered edges allowed.
Step 3: Give it a Head Start
Place both buttered slices in a cold, heavy-bottomed skillet. Now turn the heat to medium-low. Let the bread toast lightly for just about a minute.
This warm-up session does two things: it starts building a flavor base on that first side, and it means the inside of the bread will be warm when the cheese goes on, helping it melt faster and more evenly.
Step 4: Build the Sandwich
Flip one slice over. Now, pile your cheese onto this warmed, toasted side. I like to do a layer of the flavorful cheese first, then a blanket of mozzarella on top.
Place the second slice of bread on top, with its already-toasted side facing down, kissing the cheese. You’ve just created a warm cheese pocket. This is a very good thing.
Step 5: The First Crisp
Let it cook for a solid 3 minutes. Press down gently with your spatula every so often. Listen to it sizzle. You’re waiting for that deep, even golden-brown color to creep across the entire bottom slice.
If it’s browning too fast, don’t panic. Just lift the pan off the heat for a moment to let it cool down, and reduce the heat. Low and slow wins the race.
Step 6: The Grand Flip
This is the moment of truth. Slide your spatula underneath with confidence and flip that beautiful parcel over. It should feel sturdy.
Cook the other side for another 3 minutes. Press down lightly again. You’ll know it’s done when the second side is just as gloriously golden as the first.
Step 7: The Finale
Transfer your masterpiece to a cutting board. Don’t just tear into it! Take a sharp knife and cut it in half with one swift, decisive motion.
Then, slowly pull the halves apart. You will be rewarded. That long, stretchy, magnificent cheese pull is your trophy. Now, devour immediately.
Why This Method is a Game Changer
You might wonder why we go through all these steps. It seems like a lot for a simple sandwich, right? But each step has a purpose.
Buttering all four sides is the difference between a good sandwich and a great one. It creates an all-encompassing crust that’s utterly irresistible.
Starting in a cold pan allows the butter to melt slowly into the bread, rather than burning instantly. And toasting one side first is the secret trick that guarantees your cheese is fully molten by the time your bread is perfectly crisp.
It’s these tiny, thoughtful details that elevate it from a quick snack to a culinary experience.
Tips
• Grate Your Own Cheese: I know I already said it, but it’s that important. The melt is so much creamier and more consistent. It’s the single biggest upgrade you can make.
• Low and Slow is the Way to Go: Rushing this process over high heat will give you a blackened outside and a cold, unmelted inside. Patience is your best friend here.
• The Press: Use a bacon press or a small, heavy saucepan to gently weigh the sandwich down. This ensures even contact with the pan for an all-over crisp.
• The Peek Test: If you’re unsure if the cheese has melted, gently lift a corner with your spatula and take a quick peek. It’s better to check than to overcook the bread.
Ingredient Substitutions
No sourdough? A sturdy country white or rye bread will work in a pinch. The key is to avoid super soft, thin sandwich bread that can’t handle the weight and heat.
Out of salted butter? Unsalted butter with a very light sprinkle of flaky sea salt spread over it will do the trick. You need that saltiness.
For the cheeses, the world is your oyster! The two-cheese combo is the key, but you can mix and match. Try Monterey Jack for its superb melt, Swiss for its distinct flavor, or even a pepper jack for a little kick.
Best Time to Serve This Dish
Is there ever a bad time for a perfect grilled cheese? Honestly, no. It’s the ultimate lunch on a rainy day, the perfect quick dinner when you’re cooking for one, and the best late-night snack imaginable.
It’s also a phenomenal companion to a big, steaming bowl of tomato soup. The classic pairing exists for a reason—they’re a match made in heaven. Serve it up on a chilly afternoon for the ultimate comfort food experience.
How to Store and Reheat
Let’s be real: this sandwich is best eaten immediately. But if you must save one, let it cool completely, then wrap it tightly in foil or plastic wrap and store it in the fridge for up to a day.
To reheat, do not use the microwave. It will turn your crispy bread into a sad, chewy mess. Instead, unwrap it and place it back in a skillet over medium-low heat. Cook for a few minutes on each side until it’s warm all the way through and the crust has re-crisped.
It won’t be *quite* as perfect as the first time, but it’ll be pretty darn close. The stovetop is the only way to bring it back to life.
Making the ultimate grilled cheese sandwich is a act of love. It’s about embracing the simple joys and turning basic ingredients into something extraordinary.
It’s about that moment when you break it open and see that waterfall of melted cheese. It’s about the sound of the crisp crust giving way under your teeth. It’s pure, unadulterated happiness between two slices of bread.
This grilled cheese sandwich is the ultimate comfort food — crispy, buttery sourdough bread with a molten, gooey blend of melty mozzarella and rich, flavorful vintage cheddar or gruyere. It’s simple, decadent, and absolutely perfect when you want something warm, cheesy, and deeply satisfying. This isn’t just any grilled cheese — it’s the best version you’ll ever make, thanks to a few golden rules that elevate it from basic to brilliant.
ingredients
2slices sourdough bread (1.3–1.5 cm thick (0.5–0.6"))
30g salted butter (or unsalted + pinch of salt; about 2 tbsp)
1/3cup vintage cheddar or gruyere (freshly grated)
30g mozzarella (freshly grated, about 1/3 cup)
Instructions
1
Butter the breadSpread salted butter on both sides of each slice of sourdough bread. Yes — all four sides! This ensures a perfectly golden, crisp crust.
2
Lightly toastHeat a heavy-based skillet or non-stick frying pan over medium-low heat. Place both slices of bread in the pan and toast for 1 minute until lightly golden. This gives the cheese a head start on melting once assembled.
3
Add the cheeseFlip one slice of bread so the toasted side is facing up. Pile on the cheddar (or gruyere), then top with mozzarella. Place the second slice of bread on top, toasted side down, so it makes direct contact with the cheese.
4
Cook first sidePress down gently with a spatula and cook for 3 minutes, or until the underside is deep golden brown and crisp. Adjust heat if browning too quickly.
5
Flip and finishCarefully flip the sandwich. Cook the other side for another 3 minutes until golden, crisp, and the cheese is fully melted.
6
Serve immediatelyTransfer to a cutting board and cut in half decisively. Admire the glorious cheese pull, then devour while hot!
Nutrition Facts
Servings 1
Serving Size 1 sandwich
Amount Per Serving
Calories580kcal
% Daily Value *
Total Fat35g54%
Saturated Fat20g100%
Trans Fat1g
Cholesterol85mg29%
Sodium920mg39%
Potassium220mg7%
Total Carbohydrate42g15%
Dietary Fiber2g8%
Sugars5g
Protein26g52%
Calcium 730 mg
Iron 4 mg
* Percent Daily Values are based on a 2,000 calorie diet. Your daily value may be higher or lower depending on your calorie needs.
Note
Use freshly grated cheese: Pre-shredded cheese contains anti-caking agents that hinder melting. Freshly grated melts smoother and creamier.
Bread thickness matters: Slices should be around 1.3–1.5 cm thick — not too thin (will burn) or too thick (cheese won’t melt).
Skip the sandwich press: A stovetop pan delivers superior browning and texture compared to a press, which flattens the bread too much.
Variations: Add tomato slices, caramelized onions, or a smear of Dijon mustard for extra flavor.
Double it up: For two sandwiches, cook one at a time to ensure even heat and perfect crust.