
 View Gallery
1 photo
View Gallery
1 photo
Let’s have a real talk about keto bread, shall we? For a long time, I felt like finding a good slice was a bit of a fantasy. You know the one — a bread that actually holds together, doesn’t taste like scrambled eggs or damp sponge, and doesn’t require a chemistry degree to make.
I’m thrilled to tell you, after what felt like a million tests in my kitchen, we’ve finally found it. This isn’t just another recipe; it’s the one. It’s my simple, no-fuss, genuinely satisfying low carb keto bread. And the best part? No yeast, no whipping egg whites for an eternity, and absolutely no eggy aftertaste.
It’s just straightforward, delicious bread that lets you enjoy a sandwich or some toast again. I’m so excited for you to try it.
Ingredients Needed for the Recipe
Gathering the right ingredients is our first step to success. Each one has a specific job, and using them correctly makes all the difference. Here’s what you’ll need:
Dry Ingredients
- Almond Flour: This is our flour base. It gives the bread structure and that lovely, slightly nutty flavor. Make sure it’s finely ground for the best texture.
- Aluminum-Free Baking Powder: Our rising agent. The “aluminum-free” part is key—it helps avoid any metallic aftertaste. This is not the same as baking soda.
- Xanthan Gum: This is our secret weapon. Since we don’t have gluten, xanthan gum steps in to bind everything together, giving the bread a more familiar, bread-like chew.
- Fine Salt: Just a half-teaspoon to balance and enhance all the other flavors perfectly.
Wet Ingredients
- Large Eggs & Egg Whites: They provide structure, lift, and richness. Having them at room temperature is non-negotiable—it helps them incorporate beautifully for a better rise.
- Olive Oil: This adds moisture and helps create a tender crumb. A mild, light-tasting olive oil works best here.
- Natural Yogurt: The magic ingredient for moisture and a slight tang. It also reacts with the baking powder to give us a lovely lift. Full-fat is the way to go.
How to make Low Carb Keto Bread?
Ready? This process is wonderfully simple. Just follow these steps, and you’ll be on your way to fresh-bread heaven.
Step 1: The Room Temperature Rule
First things first, pull all your cold ingredients from the fridge. The eggs, yogurt, and even the oil need to lose their chill. Let them sit out for a good 30 minutes. In a rush? Place your whole eggs in a bowl of warm water for about 10 minutes. This simple step is the guardian of a good rise.
Step 2: Prep Your Pan and Oven
Preheat your oven to 350°F. Grab an 8.5 x 4.5 inch loaf pan—this size is ideal. Line it with parchment paper, letting some hang over the sides. This little sling makes removing the baked loaf an absolute breeze later on.
Step 3: Whisk the Dry Team
In a medium bowl, whisk together your almond flour, baking powder, xanthan gum, and salt. Get them really acquainted. This ensures our rising agents are evenly distributed, so you don’t get any dense pockets in the loaf.
Step 4: Unite the Wet Team
In a larger mixing bowl, combine the room-temperature eggs, egg whites, olive oil, and yogurt. Use a whisk here and beat them until the mixture is completely smooth and homogenous. You’ll see it come together into a creamy, pale yellow blend.
Step 5: Bring It All Together
Now, add the dry ingredients to the wet. Switch to a spatula and fold gently until just combined. Don’t overmix! A few streaks of flour are fine. The batter will be thick, like a traditional muffin batter.
Step 6: Into the Pan and Oven
Pour the batter into your prepared loaf pan. Use the spatula to spread it evenly into the corners and smooth the top. Pop it into the center of your preheated oven. Now, the hardest part: try not to open the door for at least 40 minutes.
Step 7: The Bake and The Wait
Bake for 45 to 50 minutes. You’re looking for a deep golden-brown crust that feels firm and sounds hollow when lightly tapped. A toothpick inserted in the center should come out clean. Let the bread cool in the pan for just 5 minutes, then use the parchment paper to lift it out onto a cooling rack.
Step 8: The Crucial Cool Down
This is the ultimate test of patience. You must let the bread cool completely before you even think about slicing. I know, the aroma is incredible. But slicing it warm can make it gummy. Waiting ensures clean, perfect slices.
Tips
- Embrace the “Dry-Out”: This is my favorite texture hack. Once the loaf is completely cool, slice the entire thing. Lay the slices out on a rack or plate for about an hour. This lets the moisture evaporate just a touch, transforming the texture from good to truly exceptional—more toast-like and less spongy.
- Slice it Thin: This is a hearty, satisfying bread. You’ll find a thinner slice is often more enjoyable and makes the perfect vehicle for your favorite toppings. A sharp serrated knife is your best friend here.
- Manage Expectations with Joy: This is not fluffy, airy supermarket wheat bread, and that’s okay! It’s its own wonderful thing: dense, moist, nutty, and incredibly versatile. Celebrate what it is.
- Storage is Key: Keep your loaf in a sealed bag or container at room temperature for 2-3 days. For longer storage, slice and freeze it. You can pop frozen slices straight into the toaster.
Substitutions and Variations
I always encourage a little kitchen play, but with keto baking, some swaps are trickier than others. Here’s what I know works.
For Almond Flour: I haven’t tested a direct swap with coconut flour—they absorb liquid so differently it would be a disaster. If you need a nut-free option, sunflower seed flour is a potential 1:1 substitute, but be aware it can give bread a greenish tint over time (it’s harmless but surprising!).
For the Yogurt: Full-fat sour cream (check for no added starch) is a great 1:1 substitute. For a dairy-free version, full-fat, canned coconut milk (the thick, creamy part) should work, though the flavor will be subtly different.
For a Flavor Twist: Once you’ve mastered the base, try stirring in a tablespoon of everything bagel seasoning, some dried rosemary, or even a handful of grated sharp cheddar into the batter before baking. It’s a fantastic way to make a savory breakfast loaf.
Serving Ideas and Pairings
This is where the fun really begins. Your bread is cool, sliced, and ready for action.
For the ultimate breakfast toast, slather a slice with good butter, smashed avocado, and a sprinkle of everything bagel seasoning. Or try it with a generous swipe of almond butter and a few low-carb berries.
It makes a phenomenal sandwich bread. Pile it high with deli turkey, crisp lettuce, mayo, and mustard. The structure holds up beautifully. For a quick grilled cheese, use it in a pan with your favorite melty cheese—it gets wonderfully crisp.
Don’t forget dinner time. Thicker slices are perfect for open-faced melts or as a sturdy base for eggs Benedict. You can even cube and toast leftover slices to make the most incredible, crunchy croutons for your salad.
Your Questions, Answered
Can I use a bread machine?
You can certainly try the bake function, but it’s not necessary. Since there’s no gluten, we skip all the kneading cycles. The tricky part is the pan size in your machine—if it’s larger, your loaf will be flatter and bake faster. I find the standard loaf pan in the oven gives the most reliable, tall result.
Why no flax or chia seeds?
I’ve tried so many recipes that use them. Personally, I found they often left a slightly bitter, earthy taste that distracted from the pure, simple bread flavor I was after. This recipe is about simplicity and classic taste.
There you have it. My labor of love, condensed into one simple loaf. This bread gave me back the simple joy of a sandwich, and I truly hope it does the same for you. Happy baking.
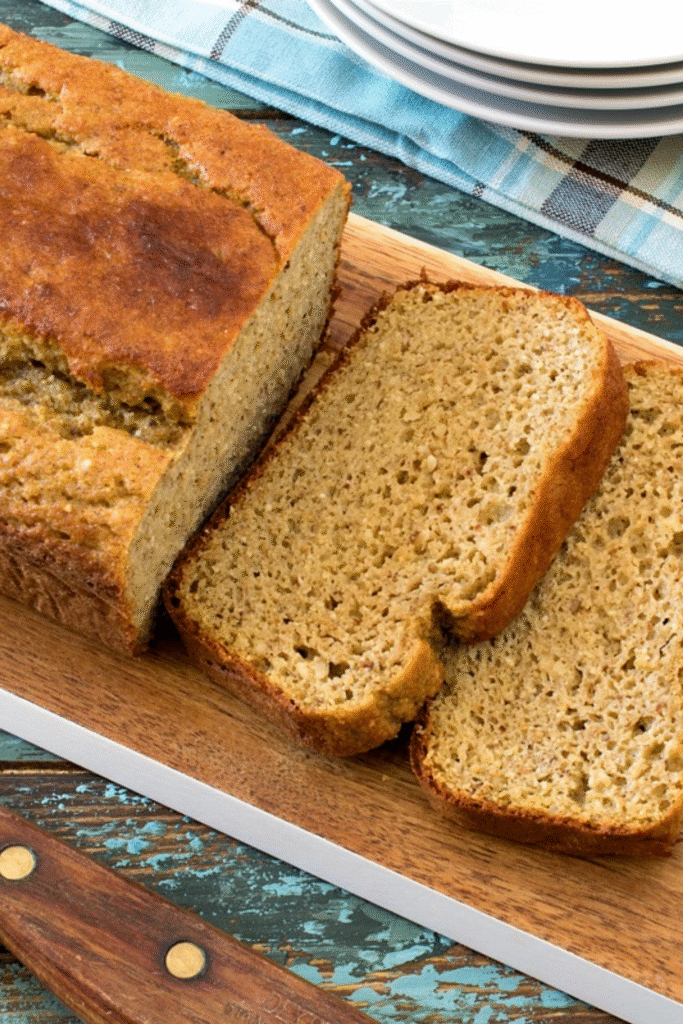
Low Carb Keto Bread Recipe
Description
Keto Bread is kind of like the holy grail of low carb baking and I really think we’ve nailed it with this recipe! This low carb Keto bread does not require you to whip egg whites, add quirky ingredients, or use yeast—and no eggy taste. It’s about as simple as it gets to make.
For my easy Keto bread recipe, I tested, retested, and tested again with various different low carb ingredients, cook times, and methods before settling on this recipe as the best low carb bread recipe we’ve made so far. I think you’ll love it!
ingredients
Dry Keto Bread Ingredients
Wet Keto Bread Ingredients
Instructions
-
Don't miss the recipe video above!
-
All ingredients must be room temperature before you start, so remove them from the fridge first and let sit for at least 30 minutes. You can put the eggs (still in the shell) in a bowl of warm water to warm up if you need to speed up the process.
-
Preheat your oven to 350°F (177°C).
-
Line an 8.5 x 4.5 inch loaf pan with parchment paper and set aside.
-
Mix all the dry ingredients together including almond flour, baking powder, xanthan gum, and fine salt.
-
All wet ingredients must be room temperature. Mix together the eggs, egg whites, olive oil, and natural yoghurt. Beat with a whisk until well combined.
-
Mix the dry keto bread ingredients into the wet ingredients, then pour into the parchment-lined loaf pan and use a spatula to spread out the bread dough evenly.
-
Bake for 45–50 minutes until the top is crusty and golden brown.
-
Let it cool in the pan for 5 minutes, then turn it out onto a cooling rack.
-
Let the bread fully cool before slicing. Makes about 18–20 thin slices.
Nutrition Facts
Servings 18
Serving Size 1 slice
- Amount Per Serving
- Calories 120kcal
- % Daily Value *
- Total Fat 10gg16%
- Saturated Fat 1.5gg8%
- Trans Fat 0gg
- Cholesterol 55mgmg19%
- Sodium 180mgmg8%
- Potassium 90mgmg3%
- Total Carbohydrate 4gg2%
- Dietary Fiber 2gg8%
- Sugars 1gg
- Protein 5gg10%
- Calcium 100mg mg
- Iron 1mg mg
* Percent Daily Values are based on a 2,000 calorie diet. Your daily value may be higher or lower depending on your calorie needs.
Note
- Everything must be at room temperature, including the eggs, yoghurt, and oil.
- Texture tip: I like to cut the bread and let the thin slices ‘dry’ out for an hour or so—the texture improves in my opinion if you have time to do this.
- Net carbs: Approximately 2g net carbs per serving (total carbs minus fiber).
- Storage: Store cooled bread in an airtight container for up to 3 days or freeze slices for longer storage.
Frequently Asked Questions
Can I make this Keto bread in a bread maker?
A bread maker is not necessary for this recipe. While you could try using one, the pan dimensions may differ significantly, affecting bake time and loaf structure. Also, since this is a gluten-free recipe, there’s no kneading cycle needed.
Can I substitute coconut flour for almond flour?
No—coconut flour cannot be substituted 1:1 for almond flour. They absorb moisture very differently. If you’d like a coconut flour version, look for a recipe specifically designed for it.
Why does my keto bread feel moist inside?
Almond flour-based breads often have a denser, slightly moist crumb. To improve texture, slice and let the bread air-dry for 30–60 minutes after cooling. Toasting also helps!