

I have baked a lot of desserts that looked great and then completely fell apart when sliced. This is not one of those desserts. This pie behaves. It sets up beautifully, slices clean, and somehow feels both rich and light at the same time.
The first time I made it, I expected it to be fussy. Citrus desserts sometimes are. But this one surprised me. No complicated steps, no guessing, no drama. Just mix, bake, chill, and suddenly you have something that tastes like you tried way harder than you actually did.
I also love that it works year round. Yes, it screams summer, but I have absolutely served this in the middle of winter when everything felt heavy and beige and needed brightening up.
What really hooked me is the balance. Sweet, tart, creamy, a little buttery crunch from the crust. Nothing overwhelms. Every bite just feels finished, like it knows exactly what it is supposed to be.
Ingredients I Used for the Recipe
- 1½ cups finely crushed graham cracker crumbs – this forms the base and gives that slightly sandy texture that holds together when sliced.
- ⅓ cup light brown sugar – adds warmth and a subtle caramel note to keep the crust from tasting flat.
- 4 tablespoons unsalted butter, melted – binds the crumbs so the crust presses firmly into shape.
- Two 14-ounce cans sweetened condensed milk – the heart of the filling, making it creamy, smooth, and naturally sweet.
- 1 cup plain Greek yogurt – adds a gentle tang and keeps the filling from feeling too heavy.
- 1 tablespoon fresh lime zest – brings bright citrus aroma that you cannot get from juice alone.
- ¾ cup fresh lime juice – gives the pie its signature tart flavor, about 8 to 10 regular limes.
- 1 cup cold heavy cream – whipped for a soft topping that balances the sharpness of the filling.
- 2 tablespoons confectioners’ sugar – lightly sweetens the whipped cream without making it stiff.
- 1 teaspoon lime zest for garnish – a little extra freshness right at the end.
- 8 to 10 thin lime slices – optional, but they make the pie look finished and inviting.
Let Me Talk About the Limes for a Second
I use regular grocery store limes. I know the debate. But tiny specialty limes are hard to find and honestly not worth squeezing a mountain of fruit for. The flavor still comes out vibrant and authentic.
The key is using fresh juice. Bottled juice tastes flat and a little harsh. When you zest and juice real limes, the smell alone tells you the pie is going to be good.
I always zest first. Learned that the hard way after trying to zest a squeezed lime. Not my finest kitchen moment.
How to make Starbucks Medicine Ball Recipe?
Step 1 – Mix the Crust
I stir together the graham cracker crumbs, brown sugar, and melted butter. I start with a fork, then switch to my hands because it is faster and I can feel when everything is evenly coated.
The texture should feel like damp sand. If it looks dry, it will not hold. If it is too wet, it turns dense after baking.
Step 2 – Press It Into the Pan
I dump the mixture into a 9-inch pie pan and press it firmly along the sides first, then the bottom. Using the bottom of a measuring cup helps pack it tightly without overthinking it.
This step matters more than people think. A loose crust crumbles later. Press like you mean it.
Step 3 – Bake the Crust Briefly
I bake it for about 10 minutes until it smells toasty and looks slightly darker. This quick bake locks everything together so it stays crisp once the filling goes in.
Then I let it cool while I make the filling. No rushing here.
Step 4 – Zest and Juice the Limes
I zest all the limes first, then cut and juice them. Fresh juice makes a huge difference in flavor. It should smell sharp and clean, not dull.
I usually need around 8 or so limes, depending on size. I always buy extra just in case.
Step 5 – Whisk the Filling Together
In a large bowl, I whisk the sweetened condensed milk, Greek yogurt, lime zest, and lime juice until smooth. The mixture thickens almost instantly, which still feels like kitchen magic.
No eggs, no complicated technique. Just whisk until creamy.
Step 6 – Fill the Crust and Bake Again
I pour the filling into the warm crust and smooth the top. It goes back into the oven for about 15 minutes, just until set but still slightly wobbly in the center.
That little wobble is exactly what you want. Overbaking makes it dense.
Step 7 – Cool and Chill Completely
I let the pie cool at room temperature for about 30 minutes, then refrigerate it for at least 3 hours. Longer is even better.
This is the hardest part because it smells amazing and you cannot eat it yet.
Step 8 – Whip the Cream and Finish
I whip the cold heavy cream until soft peaks form, add the confectioners’ sugar, and whip a little more until it holds shape but still looks soft.
Then I pile it onto the chilled pie and add lime zest and slices. It suddenly looks like something from a bakery case.
What I Learned After Making This More Times Than I Planned
This pie is all about patience. Not effort. Every time I tried to rush the chilling stage, I regretted it when the slices looked messy. Giving it time makes it slice like a dream.
I also learned not to overthink the crust. It is supposed to be simple. The slightly rustic texture is part of the charm.
And I used to make the whipped cream hours ahead. Bad idea. It deflates. Now I whip it closer to serving time and it stays fluffy.
One more thing. This pie tastes even better the next day. The flavors settle and mellow in the best way.
Tips
- Zest your limes before juicing. It saves frustration and gives better flavor distribution.
- Press the crust firmly so it holds together when slicing.
- Do not overbake the filling. A slight jiggle means it will stay creamy.
- Chill longer than you think you need. Cold pie equals clean slices.
- Use fresh lime juice only. It is the difference between good and truly bright flavor.
- Add whipped cream shortly before serving for the best texture.
- Wipe your knife between slices to keep each piece neat.
This is one of those desserts that feels nostalgic even if you did not grow up eating it. It is straightforward, comforting, and always welcome on the table. I make it when I want something reliable, something that makes people pause mid bite and smile a little.
And honestly, that is the kind of recipe I keep coming back to. Not flashy. Just really, really good.
Key Lime Pie Recipe
Description
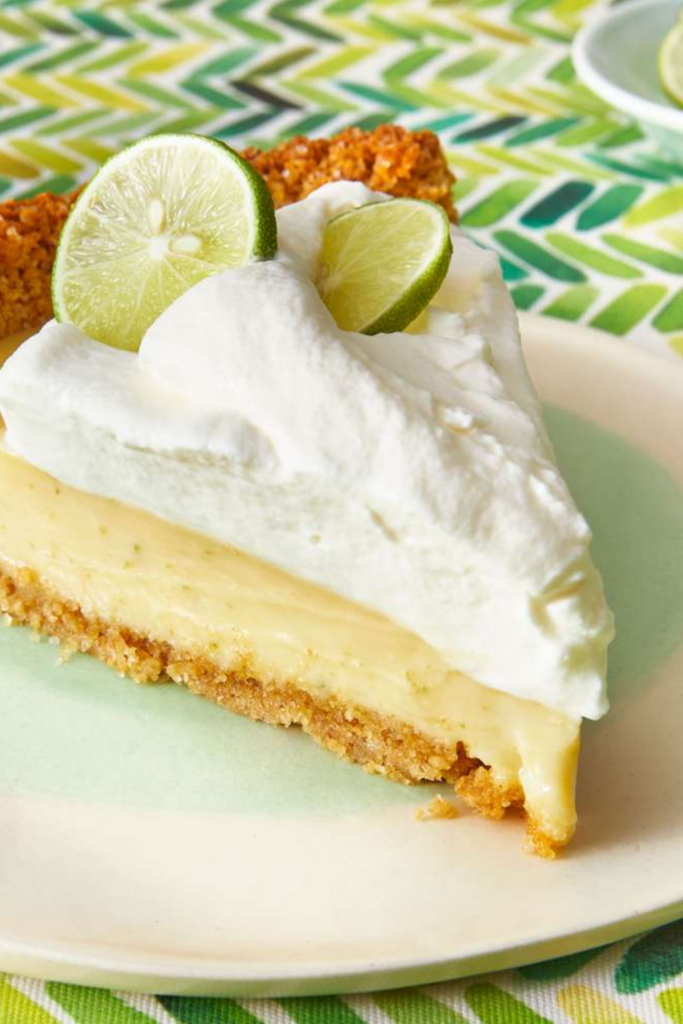
Cool, creamy, and bright, this Key Lime Pie is made for warm days and easy entertaining. Made with Persian limes (your everyday supermarket limes), this pie delivers authentic tart-sweet flavor without the hassle of hunting down tiny Key limes. A buttery graham cracker crust holds a silky filling of sweetened condensed milk, Greek yogurt, and fresh lime juice, topped with lightly sweetened whipped cream. No eggs required—just simple ingredients and minimal fuss for a showstopping dessert that tastes like sunshine in every bite.
ingredients
For the Crust
For the Filling
For the Topping
Instructions
-
Preheat & Prep
Preheat oven to 375°F (190°C) and set an oven rack in the middle position. -
Make the Crust Mixture
In a medium bowl, combine graham cracker crumbs, brown sugar, and melted butter. Stir first with a fork, then use your hands to mix until evenly combined.Mixture should resemble wet sand and hold together when pinched. -
Form the Crust
Using your fingers and the bottom of a glass or dry measuring cup, press the crumbs firmly into the bottom and up the sides of a 9 x 1½-inch (23 x 4-cm) deep-dish pie pan. Aim for a crust about ¼-inch (6-mm) thick.Pro tip: Form the sides first, then press in the bottom for even thickness. -
Blind Bake the Crust
Bake crust for 10 minutes until lightly browned. Let cool slightly on a wire rack while you prepare the filling.This quick bake sets the crust so it stays crisp once filled. -
Prep Limes & Make Filling
Lower oven temperature to 350°F (180°C). Zest limes first using a rasp grater, then juice them. In a large bowl, whisk together sweetened condensed milk, Greek yogurt, lime zest, and lime juice until smooth.No eggs? No problem—the filling will set beautifully as it chills. -
Fill & Bake
Pour filling into the warm graham cracker crust and smooth the top. Bake for 15 minutes until the filling is almost set but still wobbles slightly in the center.Avoid overbaking—the pie will firm up as it chills. -
Cool & Chill
Let pie cool at room temperature for 30 minutes, then transfer to the refrigerator to chill completely, about 3 hours or overnight.Chilling is essential for clean slices and optimal texture. -
Make Whipped Cream Topping
In the bowl of an electric mixer fitted with the whisk attachment, beat cold heavy cream until soft peaks form. Add confectioners' sugar and beat until medium peaks form.Can also be whipped by hand with a balloon whisk—just takes a bit longer! -
Assemble & Serve
Within a few hours of serving, top the chilled pie with whipped cream. Decorate with lime zest and thin lime slices. Slice into wedges, wiping your knife clean between cuts, and serve cold.Store leftovers covered in the refrigerator for up to 3 days.
Nutrition Facts
Servings 10
Serving Size 1 slice (1/10 of pie)
- Amount Per Serving
- Calories 455kcal
- % Daily Value *
- Total Fat 22gg34%
- Saturated Fat 14gg70%
- Trans Fat 0.5gg
- Cholesterol 65mgmg22%
- Sodium 180mgmg8%
- Potassium 200mgmg6%
- Total Carbohydrate 60gg20%
- Dietary Fiber 1gg4%
- Sugars 52gg
- Protein 9gg18%
- Calcium 20% DV mg
- Iron 4% DV mg
* Percent Daily Values are based on a 2,000 calorie diet. Your daily value may be higher or lower depending on your calorie needs.
Note
- Make-Ahead Tip: You can prepare the crust a day ahead, but add the filling on the day of serving to keep the crust crisp. The fully assembled pie can be made up to 1 day in advance and stored covered in the fridge.
- Lime Zesting Pro Tip: Always zest limes before juicing. Use a fine rasp grater and only remove the bright green outer layer—avoid the bitter white pith underneath.
- Dietary Variations: For a gluten-free version, use certified gluten-free graham crackers. For a lighter option, substitute light sweetened condensed milk and low-fat Greek yogurt (texture will be slightly less rich).
- Serving Suggestion: Pair with a dollop of extra whipped cream and a sprinkle of lime zest. This pie shines alongside fresh berries or a mint sprig for a bright, celebratory finish.
- Freezing Instructions: Freeze unbaked crust up to 1 month. Fully baked and chilled pie can be frozen (without whipped cream) for up to 2 weeks; thaw overnight in fridge before topping and serving.
Frequently Asked Questions
Can I use bottled Key lime juice instead of fresh limes?
While bottled Key lime juice works in a pinch, fresh lime juice delivers far superior bright, aromatic flavor. Since Persian (supermarket) limes are easy to find and juice, we highly recommend using fresh for the best results.
Why does the recipe use Greek yogurt?
Greek yogurt adds a subtle tang that balances the sweetness of the condensed milk, plus it helps create that signature creamy-yet-light texture. It also boosts protein slightly without altering the classic flavor profile.
How do I know when the pie is done baking?
The filling should be just set around the edges but still have a slight wobble in the center when gently shaken. It will continue to firm up as it cools and chills—overbaking can cause cracking or a rubbery texture.
Can I make this pie gluten-free or dairy-free?
Yes! For gluten-free: use certified gluten-free graham crackers. For dairy-free: substitute coconut cream for heavy cream, dairy-free butter for the crust, and a plant-based sweetened condensed milk alternative (note: texture and flavor will vary slightly).