I have this thing I do every spring. The asparagus shows up at the farmers market, all those tight green stalks bundled together, and I just can't help myself. I buy way too much. Then I get home and remember my husband doesn't really love asparagus on its own. He'll eat it, sure, but he's not excited about it.
So years ago I started wrapping it in bacon. Problem solved. Now he gets excited. I get to eat all the asparagus I want. It's a win-win.
But here's the thing I learned the hard way - you can't just wrap raw bacon around raw asparagus and throw it in the oven. I tried that once. The bacon was this sad, floppy mess and the asparagus was either underdone or mushy depending on which end you were eating.
Total disaster. So I figured out a better way, and honestly it's not much more work. Just one extra step that makes all the difference.
Ingredients I Used for the Recipe
Grab these things from the store. Nothing fancy here, just real food.
- 8 slices bacon (regular thickness, not thick cut) - I know thick cut sounds better but trust me on this. The thick stuff takes too long to crisp up and your asparagus will be sad by the time the bacon is done. Regular bacon renders faster and wraps easier.
- 2 pounds asparagus - Look for stalks about as thick as your pinky finger. Too skinny and they'll just shrivel up. Too thick and they're woody. About 48 spears total, give or take.
- 2 tablespoons olive oil - Just regular olive oil, nothing fancy needed here. Helps everything get brown and roasty.
- ½ teaspoon kosher salt - I use kosher because it's easier to pinch and sprinkle. If you only have table salt use less, maybe ¼ teaspoon.
- ¼ teaspoon black pepper - Fresh ground is nice but honestly the pre-ground stuff works fine too.
- 2 tablespoons pure maple syrup - This is optional but don't skip it. The sweet-salty thing is really good. Not the pancake syrup stuff though, get real maple syrup.
How I Make My Bacon Wrapped Asparagus
Okay so here's how I do it now after messing this up a few times. The trick is starting the bacon first. I know it seems like an extra step but it's the difference between crispy bacon and sad bacon.
Step 1 - Getting the Oven Ready
First thing I do is move the rack to the middle of the oven and crank it to 400 degrees. Not 375, not 425. 400 is the sweet spot. High enough to crisp things up but not so hot that the bacon burns before the asparagus cooks through. I learned that the hard way too.
Step 2 - Par-Cooking the Bacon
Line a baking sheet with foil. Just makes cleanup easier later. Put a wire rack on top and lay your bacon strips out. Don't overlap them. Pop that in the oven for about 7 to 8 minutes. You're not trying to make crispy breakfast bacon here.
You want it to start rendering some fat and turn reddish, but still be flexible enough to bend around the asparagus. Take it out and let it cool a bit while you prep the asparagus. You'll see some fat dripped down - that's good.
Step 3 - Getting the Asparagus Ready
Rinse your asparagus under cold water and dry it really well. This matters more than you'd think. Wet asparagus steams instead of roasts and then you're back to sad vegetable territory. Snap off the woody ends - don't cut them with a knife because each stalk breaks at its own natural point.
Just hold a stalk near the bottom and bend until it snaps. That's where the tender part starts. I usually end up with stalks about 7 inches long. Then put them in a bowl, drizzle with olive oil, and toss with the salt and pepper. Use your hands, it's faster.
Step 4 - Wrapping Everything Up
Grab about 5 or 6 asparagus spears and bunch them together. Not too tight but not loose either. Take one piece of your partially cooked bacon and start just below the tips, wrap it around kind of spiraling down to cover the middle section.
The bacon should be slightly overlapping as you go. Stick a toothpick through the end to keep it from unraveling. I've had bacon unwrap mid-roast before and it's annoying. The toothpick saves you. Do this with all your bundles, you should get about 8 total depending on how many spears you have.
Step 5 - Adding the Glaze
Put the wrapped bundles back on that same wire rack (the one that already has bacon grease on it - that's flavor right there). Get your maple syrup and brush it over the bacon.
Don't drown it, just a light coat. The syrup will caramelize in the oven and get all sticky and good. Sometimes I add a tiny pinch more black pepper on top here.
Step 6 - Roasting Time
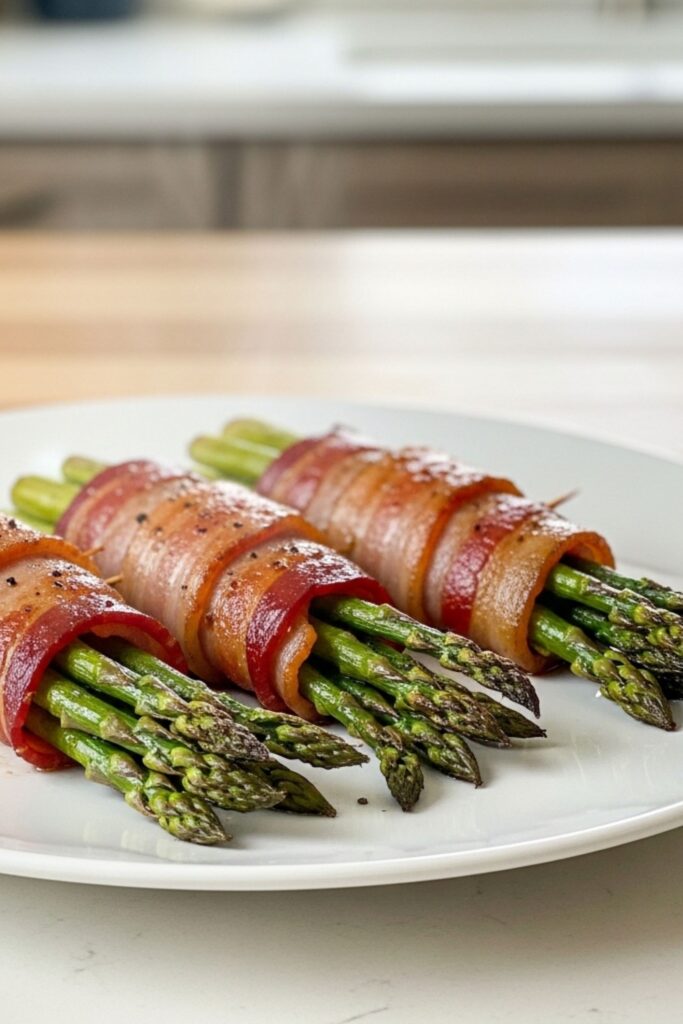
Back into the 400 degree oven for about 13 to 15 minutes. You're looking for the bacon to be brown and crispy on the edges and the asparagus tips to be lightly golden.
The asparagus should be tender but still have some structure - you want it to hold its shape, not flop over when you pick it up.
Pull the toothpicks out before serving. Don't forget that part. I've definitely handed someone a toothpick-filled bundle before.
A Few Tips I Picked Up Along the Way
The first time I made these I used super thin asparagus because that's what the store had. Big mistake. They just couldn't hold up to the cooking time and turned into mush. Now I'm picky about stalk thickness. Go for medium spears, about half an inch thick. They can handle the heat.
If you're using thick cut bacon because that's what you have, par-cook it longer. Like 10 to 12 minutes instead of 7 or 8. It should still be bendy but more of the fat will have rendered. Otherwise your asparagus will be overdone waiting for the bacon to crisp.
Don't soak your asparagus to clean it. Just rinse and dry. Water is the enemy of crispy bacon. If the spears are wet they'll steam and everything will be sad.