
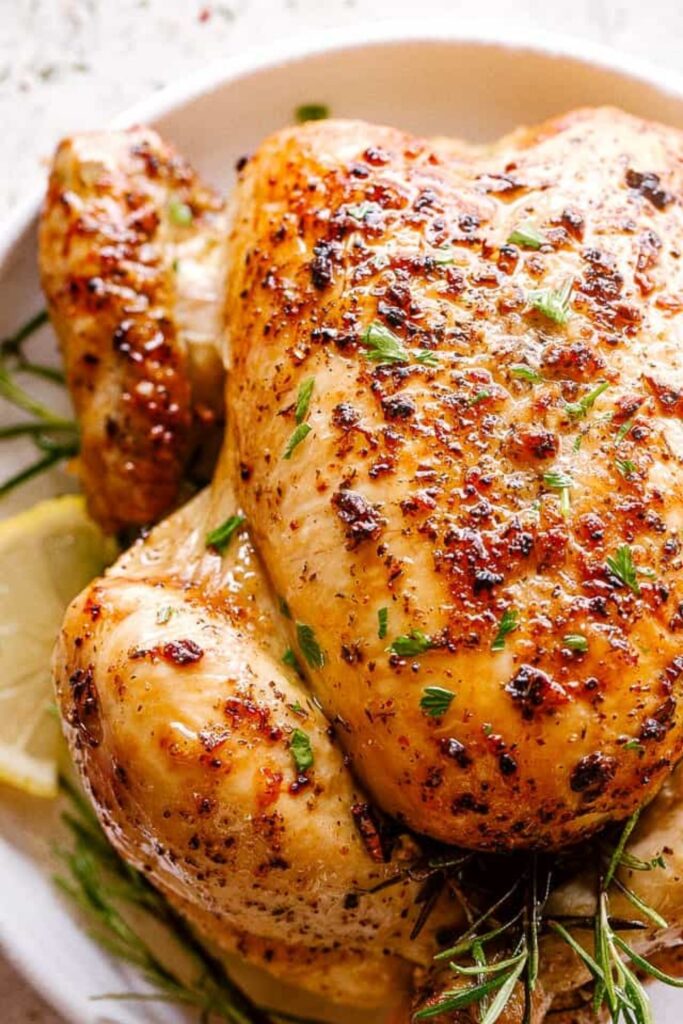

I’ve cooked a lot of chicken in my life, and most of it was… fine. Edible, even decent. But this one? This is the one I keep coming back to when I want something that actually feels like a proper meal.
The skin turns deeply golden and crisp, like it means it. Inside stays juicy in a way that still surprises me every time I carve into it. And the pan juices… yeah, those don’t last long on the table.
I used to think roast chicken was boring. Turns out, I just wasn’t doing it right.
Why this roast chicken finally worked for me
I used to skip whole chickens because they felt intimidating. Too big, too uneven, too easy to mess up. Either dry breast or undercooked legs. No in-between.
The first time I pushed butter under the skin though, everything changed. It felt a little weird, honestly. Like I was doing something wrong. But that’s where the magic happens.
Most of that garlic-herb butter melts into the meat instead of just sitting on top. That’s the difference. That’s why this actually tastes like something.
Also, I stopped obsessing over stuffing flavor into the cavity. I used to throw garlic in there thinking it would infuse everything. It doesn’t. It just steams and sits there. Learned that the hard way.
Ingredients I Used for the Recipe
- 1.75 to 2 kg whole chicken – the main thing, I pat it dry so the skin crisps properly
- Salt and pepper – for seasoning all over, nothing fancy but it matters more than you think
- 2 tsp olive oil – helps the skin get that golden finish
- 1 lemon, quartered – adds a light freshness and a bit of juice for the butter
- 3 rosemary sprigs – mostly for aroma, not overpowering flavor
- 100 g unsalted butter, melted – the base of everything, keeps the chicken juicy
- 3 garlic cloves, minced – gives that deep savory kick
- 1 tbsp sage, chopped – earthy and slightly warm flavor
- 2 tsp rosemary, chopped – ties everything together with a herby note
- 1 tbsp parsley, chopped – freshens up the butter mix
- 1/2 tsp salt and black pepper – for seasoning the butter itself
- 1 cup dry white wine or chicken broth – forms the base of the pan juices
- 1 onion, quartered – lifts the chicken and adds sweetness to the juices
- 1 garlic bulb, halved – flavors the pan juices, not the inside of the chicken
How to make Starbucks Medicine Ball Recipe?
Step 1 – Bring the chicken to room temp
I take the chicken out about 30 minutes before cooking. I used to skip this, and yeah, it cooks unevenly if it’s ice cold in the center.
Step 2 – Make the garlic herb butter
I mix the melted butter with garlic, herbs, salt, pepper, and a squeeze of lemon. It smells ridiculously good already at this point.
Step 3 – Loosen the skin carefully
This part used to scare me. I use a spoon now, not my fingers. It slides under the skin without tearing it. Once you get the hang of it, it’s oddly satisfying.
Step 4 – Get the butter under the skin
I pour most of the butter under the skin and kind of spread it around from the outside. It’s messy, but that’s where the flavor really sits.
Step 5 – Coat the outside
Whatever butter is left goes on top. Not too much garlic here though, it burns. Learned that after one very bitter batch.
Step 6 – Stuff lightly
I put lemon wedges and rosemary inside. Not for strong flavor, just for that subtle scent when you cut into it. It’s more of a vibe than a taste.
Step 7 – Prep the base
I scatter onion and garlic in the pan, then place the chicken on top. It lifts the chicken so it cooks evenly and makes the pan juices way better.
Step 8 – Season and pour liquid
Salt and pepper all over, then I pour wine or broth around the base. Not over the chicken. Around it.
Step 9 – Roast hot, then slow
I start at a high temperature for 10 minutes, then drop it down and let it cook through. I baste it a couple times, even though sometimes I forget and it still turns out good.
Step 10 – Let it rest
This is the hardest part. I let it sit for 15 minutes without covering. If you cover it, the skin goes soft. Not worth it.
What I learned after messing this up a few times
I used to think more butter on top meant better flavor. It doesn’t. Too much on the surface just burns. Under the skin is where it counts.
Also, I stopped stressing about perfect carving. The first few times I hacked into it like I had no idea what I was doing. Still tasted amazing.
And the pan juices? I didn’t even realize how good they were until I accidentally poured them over rice one night. That was it. Now I guard them.
Tips
- Use most of the butter under the skin, not on top
- Don’t skip drying the chicken, it really affects the crispiness
- Start with high heat, then lower it for even cooking
- Don’t overstuff the cavity, it doesn’t do much
- Let the chicken rest uncovered so the skin stays crisp
- Baste if you remember, but don’t stress if you forget
What I actually do with leftovers
Leftovers never last long here, but when they do, I don’t overthink it. I shred the chicken and throw it into whatever I’m making next.
Sometimes it goes into a quick sandwich with whatever sauce is in the fridge. Other times I toss it into a pan with rice and call it dinner.
Once, I used the bones to make broth and felt weirdly proud of myself. Like I had my life together for a second.
Honestly though, the best part is eating it straight from the fridge the next day. Cold chicken, no effort. Still good.
Roast Chicken Recipe
Description
Roast Chicken slathered with a garlic-herb-lemon butter then oven roasted to golden crispy perfection. Juicy on the inside, and served with liquid gold pan juices loaded with flavour, this is THE Roast Chicken recipe you'll make over and over again! The best roast chicken has garlic herb butter under and on the skin, is stuffed with lemon and herbs, roasted until it's crispy and deep golden on the outside, and juicy on the inside.
ingredients
Main Ingredients
Garlic-Herb-Lemon Butter
Under the Chicken
Instructions
Preparation
-
Bring chicken to room temperature
Take the chicken out of the fridge 30 minutes before cooking.This ensures even cooking throughout -
Preheat oven
Preheat oven to 220°C/450°F (standard) or 200°C/430°F (fan/convection). Place oven shelf in the middle position.High initial heat creates crispy skin -
Make garlic-herb butter
Mix together all Butter ingredients in a bowl. Add juice from 2 wedges of lemon and stir to combine.Reserve lemon wedges for stuffing -
Loosen chicken skin
Place chicken in a roasting pan. Use an upside-down dessert spoon to gently loosen skin from chicken breast and drumsticks – not the underside. The spoon's shape hugs the curves and won't tear the skin.Pro tip: Work gently to keep skin intact
Butter & Stuff
-
Apply butter under skin
Prop chicken upright and drizzle most of the garlic-herb butter under the loosened skin, saving a small amount for the surface. Spread gently from the outside to distribute evenly.Keep garlic-herb sludge under skin to prevent burning on surface -
Coat exterior & stuff
Drizzle/smear remaining butter all over the chicken surface. Squeeze juice from 2 lemon wedges over the top. Stuff the used lemon wedges and rosemary sprigs inside the chicken cavity.Stuffing adds aromatic perfume, not intense flavor -
Truss and season
Tie drumstick ends together with kitchen string and tuck wing tips under the chicken. Sprinkle the entire chicken generously with salt and black pepper.Trussing promotes even cooking and presentation
Roasting
-
Prepare roasting pan
Place quartered onion and halved garlic bulb in the roasting pan. Place chicken on top. Pour wine around (not over) the chicken, then drizzle the chicken with olive oil.Aromatics elevate chicken and flavor the pan juices -
Initial high-heat roast
Transfer to oven and roast for 10 minutes at 220°C/450°F to crisp the skin.Don't open oven door during this stage -
Reduce heat and continue roasting
Reduce oven temperature to 180°C/350°F (all oven types). Roast for a further 1 hour 15 minutes, or until internal temperature reaches 75°C/165°F at the thickest part of the thigh, or until juices run clear when pierced at the drumstick-body join. Baste twice during cooking (at 30 min and 1 hr), spooning pan juices over the skin.Use a meat thermometer for accuracy; cooking time formula: 20 min per 500g/1lb after initial 10 min -
Rest the chicken
Remove from oven and rest for 15 minutes before carving. Do not cover with foil, as this will make the crispy skin become wet.Resting allows juices to redistribute for maximum juiciness -
Serve
Carve chicken and serve with the liquid gold pan juices spooned over the top. Discard the onion but use the roasted garlic from the pan. Enjoy with your favorite sides!Pan juices are the ultimate sauce – no gravy needed!
Nutrition Facts
Servings 5
Serving Size 399g
- Amount Per Serving
- Calories 505kcal
- % Daily Value *
- Total Fat 38gg59%
- Saturated Fat 14gg70%
- Trans Fat 0gg
- Cholesterol 165mgmg56%
- Sodium 450mgmg19%
- Potassium 400mgmg12%
- Total Carbohydrate 4gg2%
- Dietary Fiber 1gg4%
- Sugars 2gg
- Protein 35gg70%
- Calcium 35mg mg
- Iron 2.1mg mg
* Percent Daily Values are based on a 2,000 calorie diet. Your daily value may be higher or lower depending on your calorie needs.
Note
- Herb substitutions: Rosemary and sage are classic with chicken; parsley adds freshness. Can substitute with 2-3 tsp dried herbs (use 2 tsp strong herbs like thyme/oregano/sage, or 3 tsp light herbs like dill/parsley).
- Onion & garlic tip: Don't bother peeling the onion – it gets slimy under the chicken and is usually discarded. The garlic bulb halves roast beautifully and can be squeezed out as a spread!
- Butter application: Get most of the garlic-herb sludge UNDER the skin. Garlic on the surface burns easily, so minimize sludge on the skin itself.
- Gravy option: Make a roux with 3 tbsp butter + 3 tbsp flour, then whisk in 2 cups pan liquid (topped up with broth). Simmer 2 minutes until thickened. Season to taste.
- Cook time formula: 10 min at 220°C/450°F, then 20 min per 500g/1lb at 180°C/350°F. Add 10 extra minutes if chicken goes in fridge-cold.
- Leftover carcass: Simmer with water, veggies, and herbs for 1 hour to make incredible homemade broth for soups!
- Side suggestions: Roast potatoes (add to pan for last 40 min), mashed potato, garlic bread, or a fresh green salad with Italian dressing.

Frequently Asked Questions
How do I know when the roast chicken is done?
The chicken is done when the internal temperature at the thickest part of the thigh (not touching bone) reaches 75°C/165°F, OR when juices run clear when you pierce the join between the drumstick and body. The legs should also move freely in their sockets.
Can I make this recipe ahead of time?
You can prep the chicken with butter under the skin up to 24 hours ahead – cover and refrigerate. Bring to room temperature for 30 minutes before roasting. Leftover cooked chicken keeps 3-4 days refrigerated and is perfect for salads, sandwiches, or soup.
What if I don't have wine for the pan?
No problem! Low-sodium chicken broth works beautifully as a substitute. The wine adds subtle acidity that brightens the pan juices, but broth still creates delicious liquid gold for serving.
Why rest the chicken? Can I skip this step?
Resting is essential! It allows the juices to redistribute throughout the meat. If you carve immediately, precious juices will run out onto the board. Also, never cover with foil while resting – trapped steam will soften that gorgeous crispy skin.
Can I use dried herbs instead of fresh?
Yes! Use 2 tsp of strong dried herbs (rosemary, sage, thyme, oregano) or 3 tsp of mild dried herbs (parsley, dill). Fresh herbs offer brighter flavor, but dried work well in a pinch.